How to Create Customer Groups
Your Shopify store lets you make customer groups based on different filters. Here’s how to do it step by step:
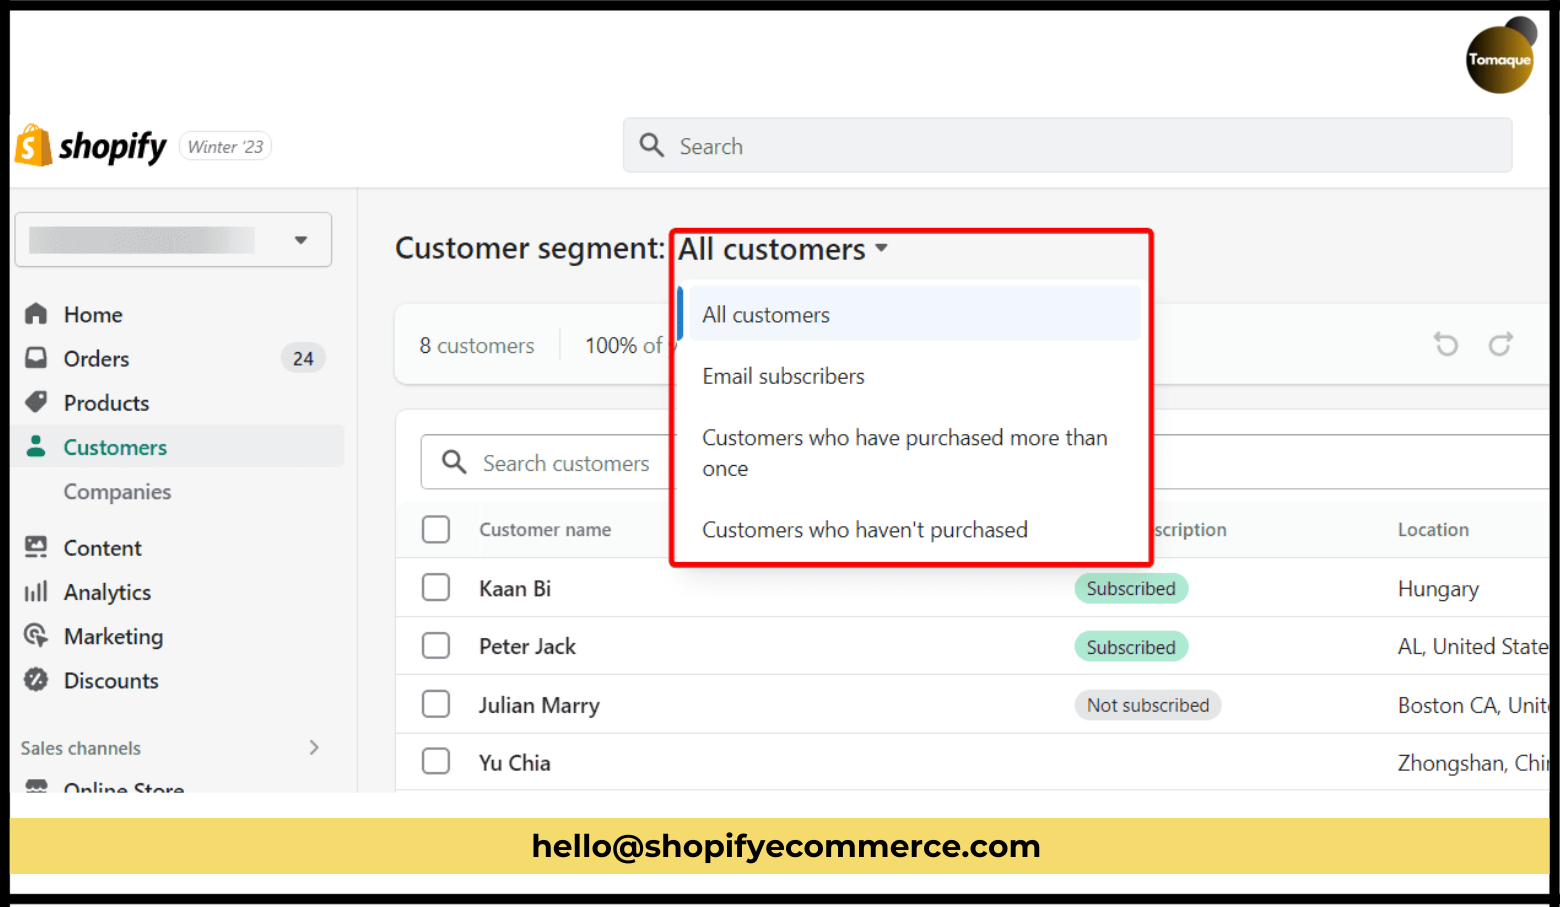
Step 1: Open the Customer List

- Log in to your Shopify store.
- Go to the Customers section in the admin panel.
- Look for a button that says Show Editor at the top right of the customer list and click it.
Step 2: Apply a Filter
- A box will pop up where you can create a special filter or choose one from a list.
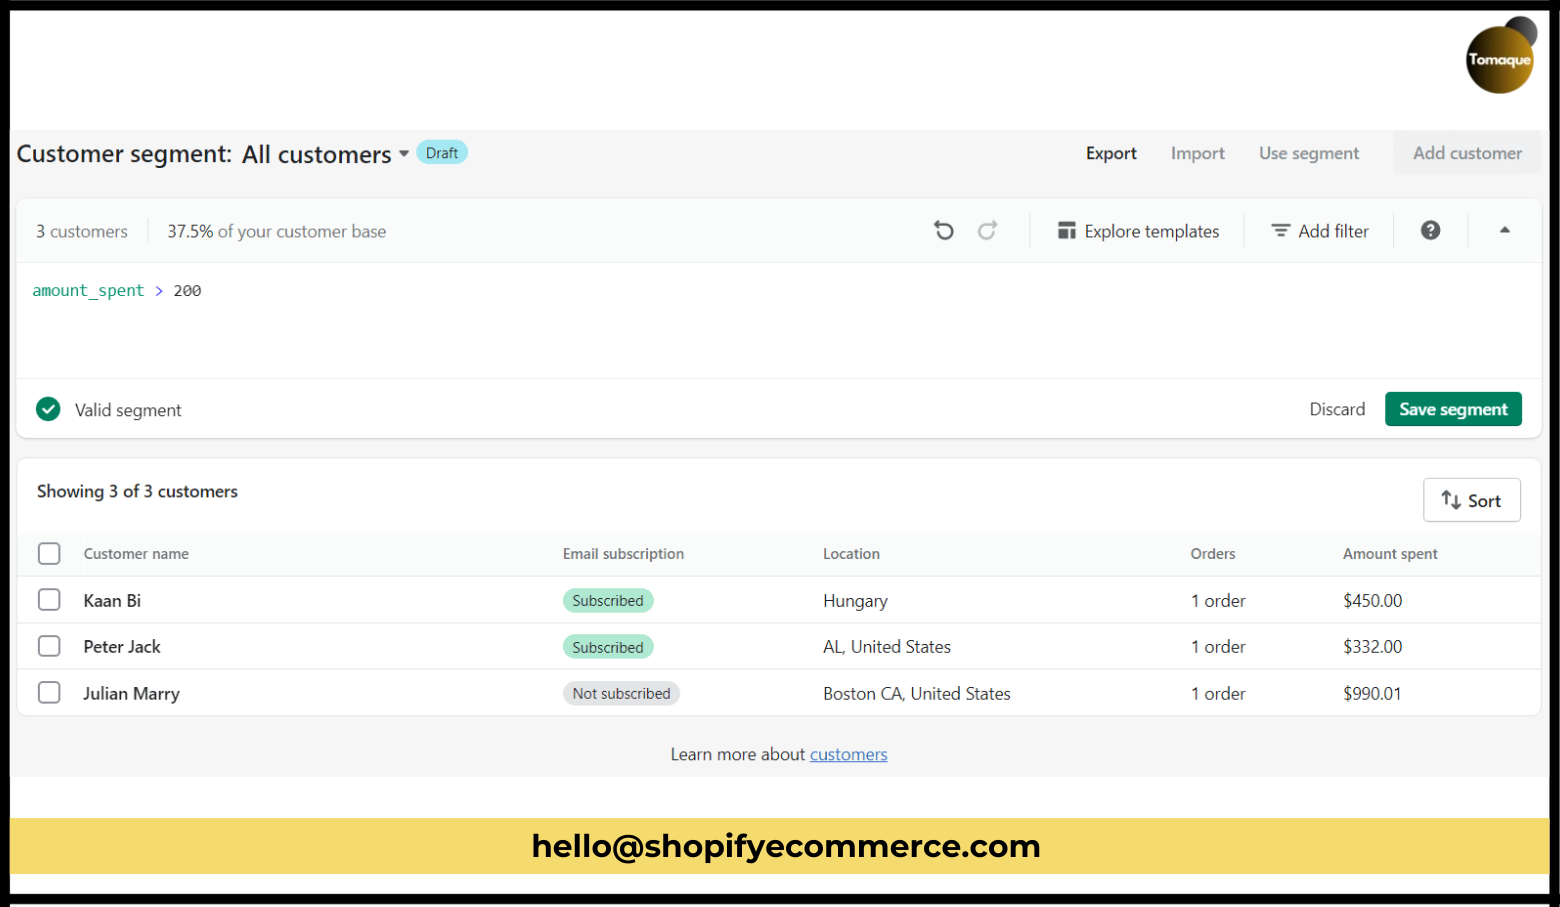
- Let’s say you want to find customers who spent more than $200. You would type this in the box:
- amount_spent > 200
- After typing that, click the Apply button.
Now, you will see a list of all the customers who spent more than $200!
Step 3: Save Your Customer Group
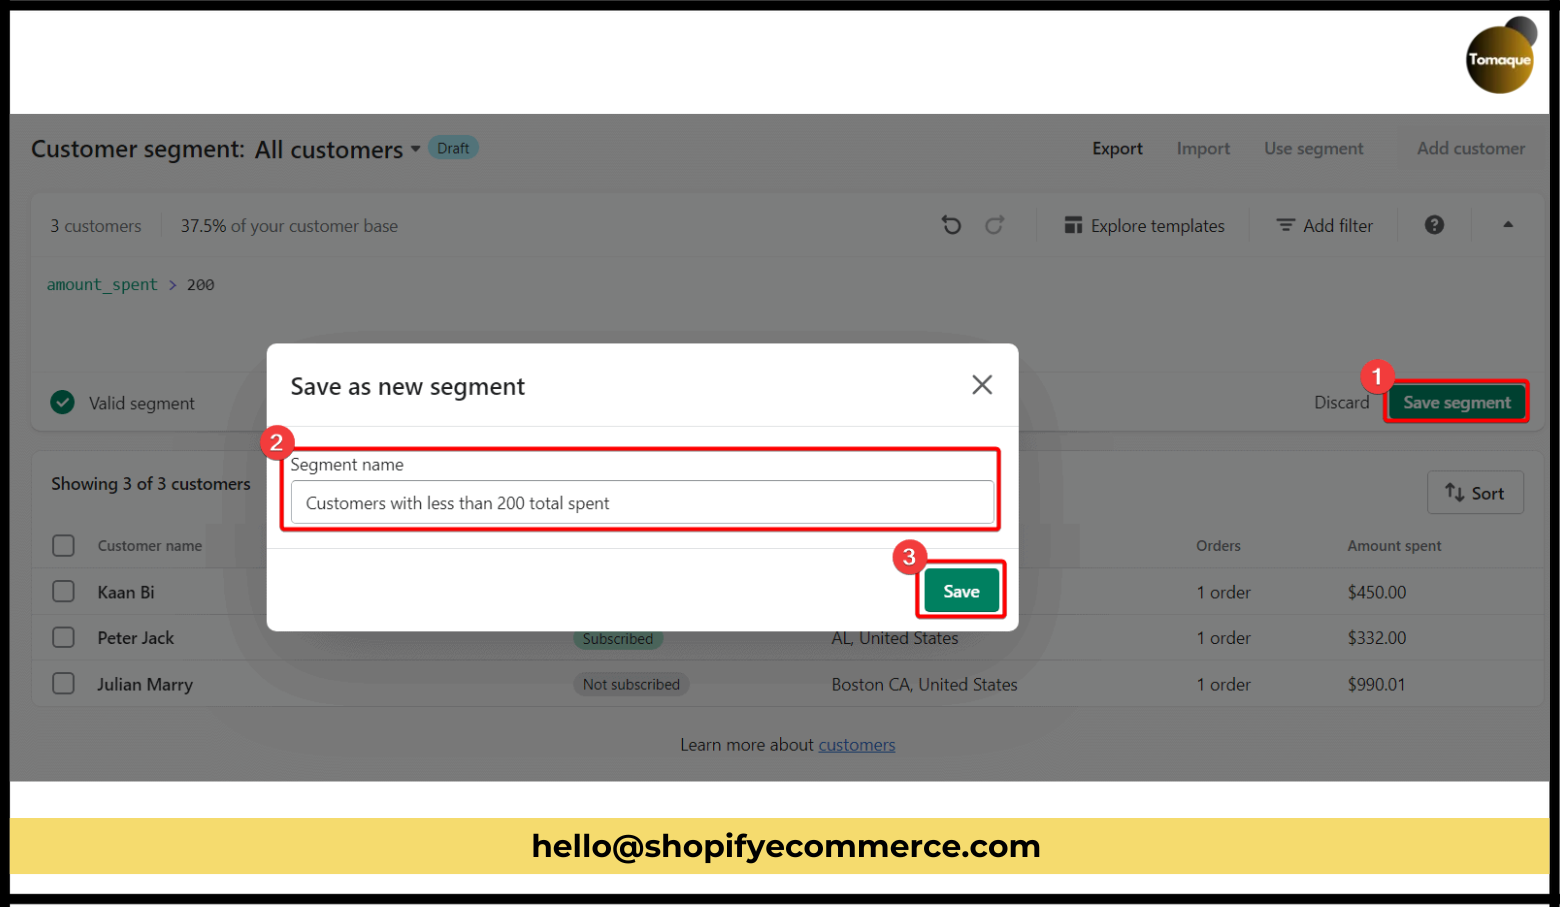
- Click on the Save Segment button.
- Give your new customer group a name, like “Big Spenders.”
- Click Save again.
Yay! 🎉 You have successfully created a customer group! Now, whenever you want to see this group, you can just select it from the customer list.
How Do Customer Groups Work?
The great thing about these customer groups is that they automatically change! If someone spends more money and goes over $200, they will be added to your group without you having to do anything extra. And if someone spends less than that, they will be removed from the group automatically.
Using Customer Tags
If you want to create a customer group manually, you can use something called customer tags. Here’s how:
- Add Tags: You can give each customer tags like “VIP,” “Newbie,” or “Frequent Buyer.” This helps you remember what kind of customer they are.
- Create Groups Using Tags: When you want to see all VIP customers or all Newbies, just use the tag filter to find them quickly.
Using tags is an easy way to organize your customers without creating many different segments!
Tips for Effective Customer Segmentation
Here are some tips to make sure your customer segmentation works well:
- Keep It Simple: Don’t create too many groups at once. Start with a few important ones and expand as needed.
- Update Regularly: Make sure to check and update your customer groups regularly so they stay accurate and useful.
- Analyze Sales Data: Look at how different groups respond to promotions or campaigns so you can improve your marketing strategies.
- Ask for Feedback: Sometimes it’s good to ask customers what they think about your products or services. You can use this feedback to create better groups or improve existing ones.
- Use Automation Tools: If possible, use tools that help automate tasks related to segmentation and marketing campaigns based on these groups.
Summary
Making and saving customer groups in your Shopify store is simple and helps you manage your business better. Just follow the steps above, and you’ll be able to create different groups for your customers easily!