How to Import Customers Using a CSV File
Follow these simple steps to import your customers using a CSV file:
Step 1: Prepare Your Customer CSV File
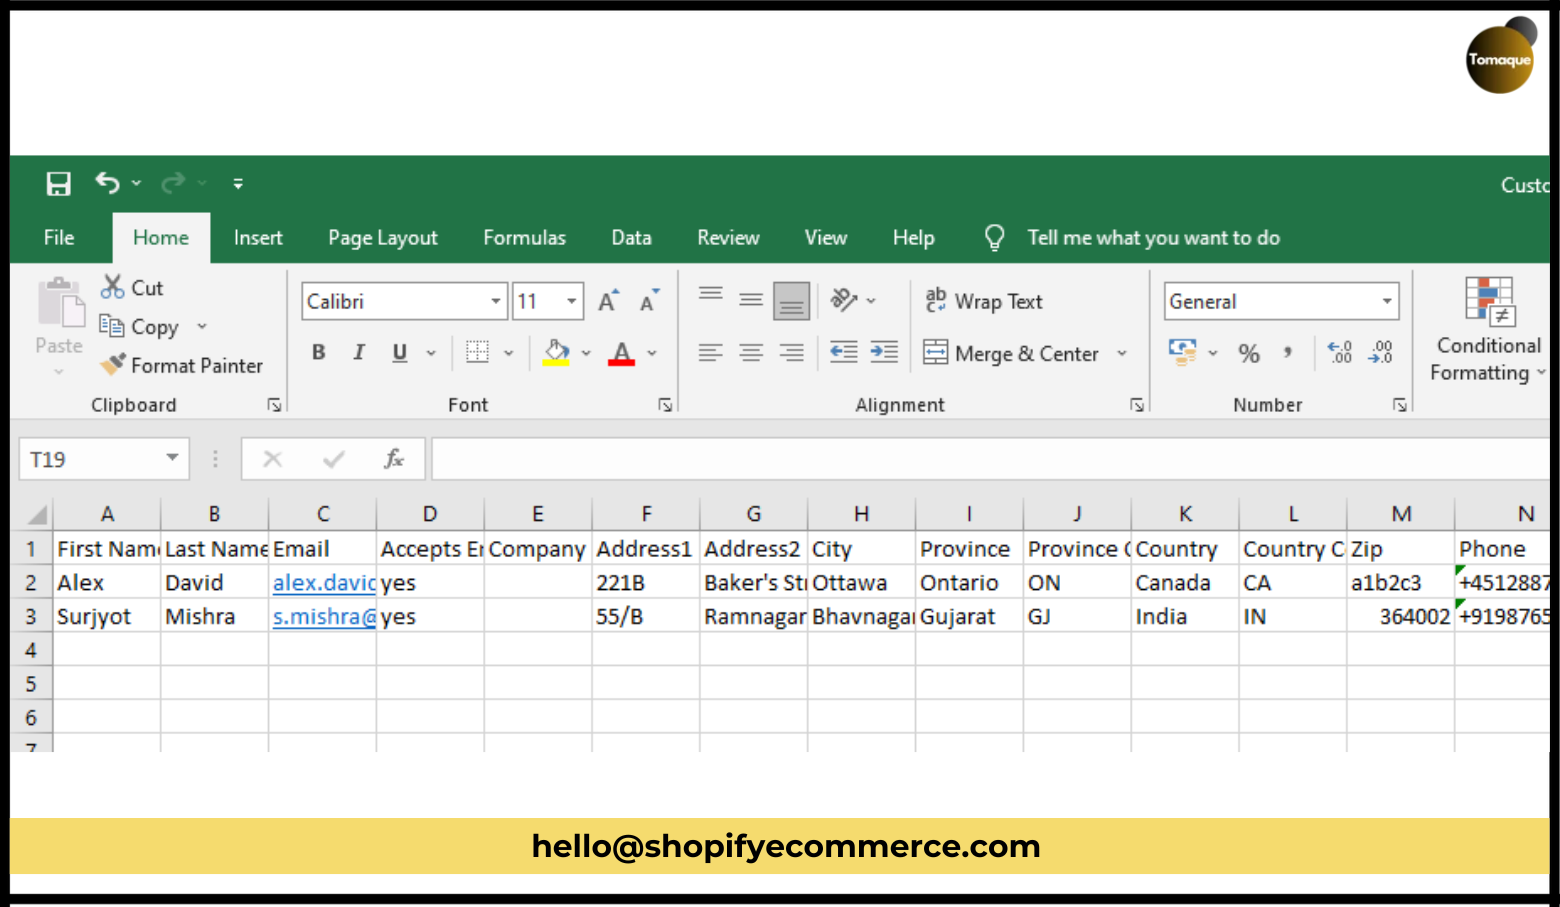
First, you need to make the CSV file ready before you upload it.
- Download the Template: Get the template for the customer CSV file from your new store. This will help you know what information to include.
- Check the Headers: The first row of the file should have special words called headers (like “Email” or “Name”). These need to match exactly what the template shows.
- Remember: The email field is very important! It must be filled out, but it can also be left blank for some customers.
Once everything looks good, save your file as a CSV.
Step 2: Go to Your Store’s Admin Panel
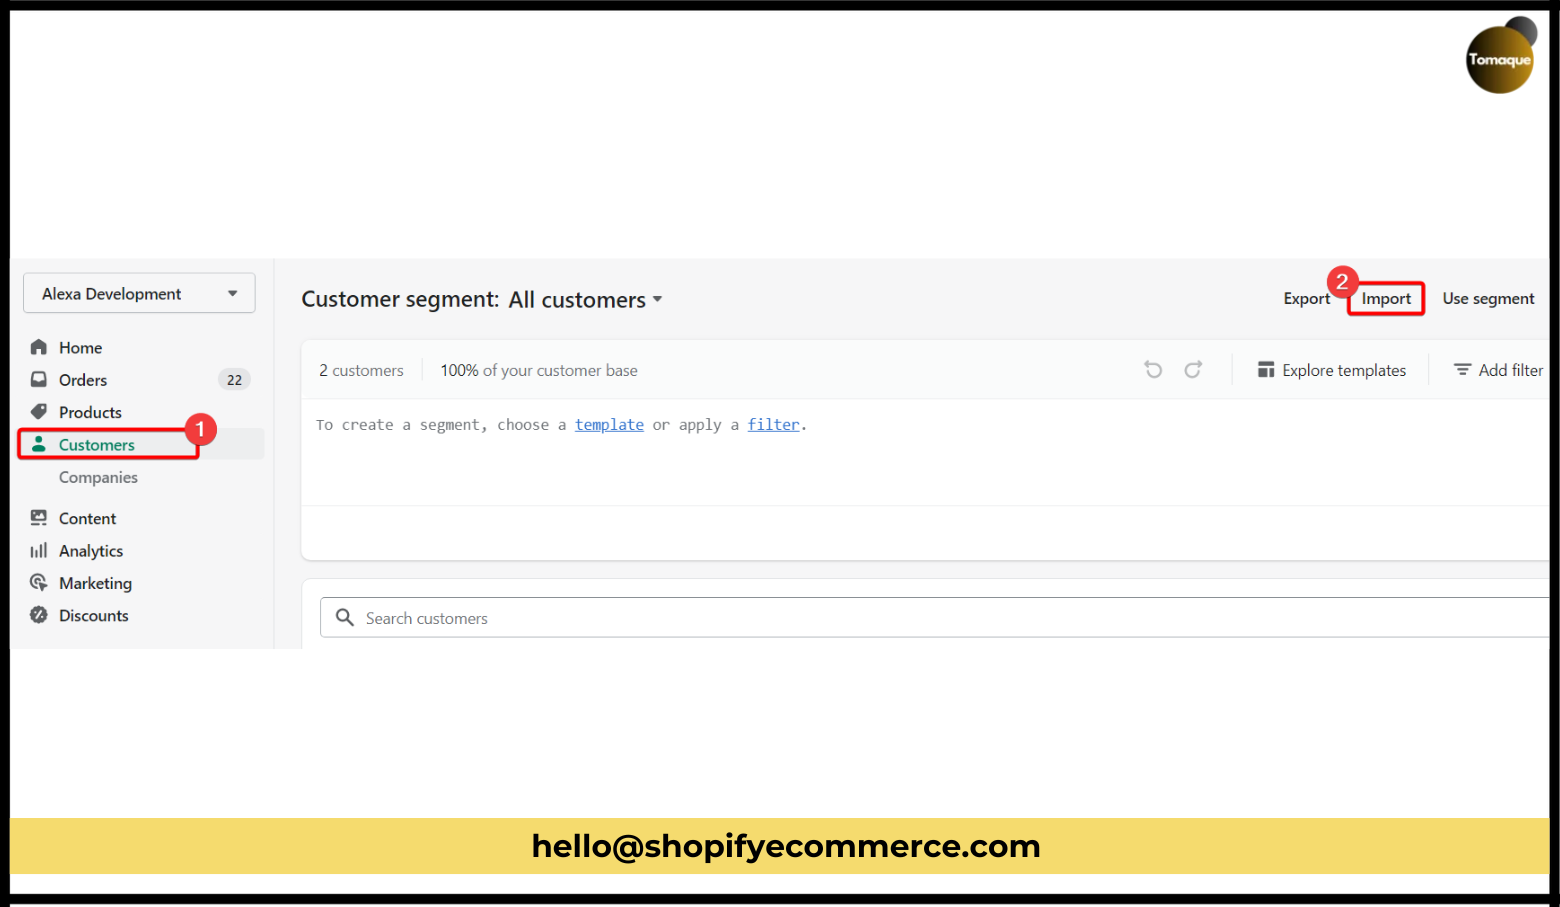
- Log in to your store.
- Click on Customers in the menu on the left side.
- Find and click on the Import button at the top right corner of the customer page.
Step 3: Upload Your Customer CSV File

- A pop-up window will appear asking you to upload your CSV file.
- If you want to replace any old customer information with new details (like if someone has changed their email), check the box that says “Overwrite existing customers that have the same email or phone.”
- Finally, click on the button that says Import Customers.
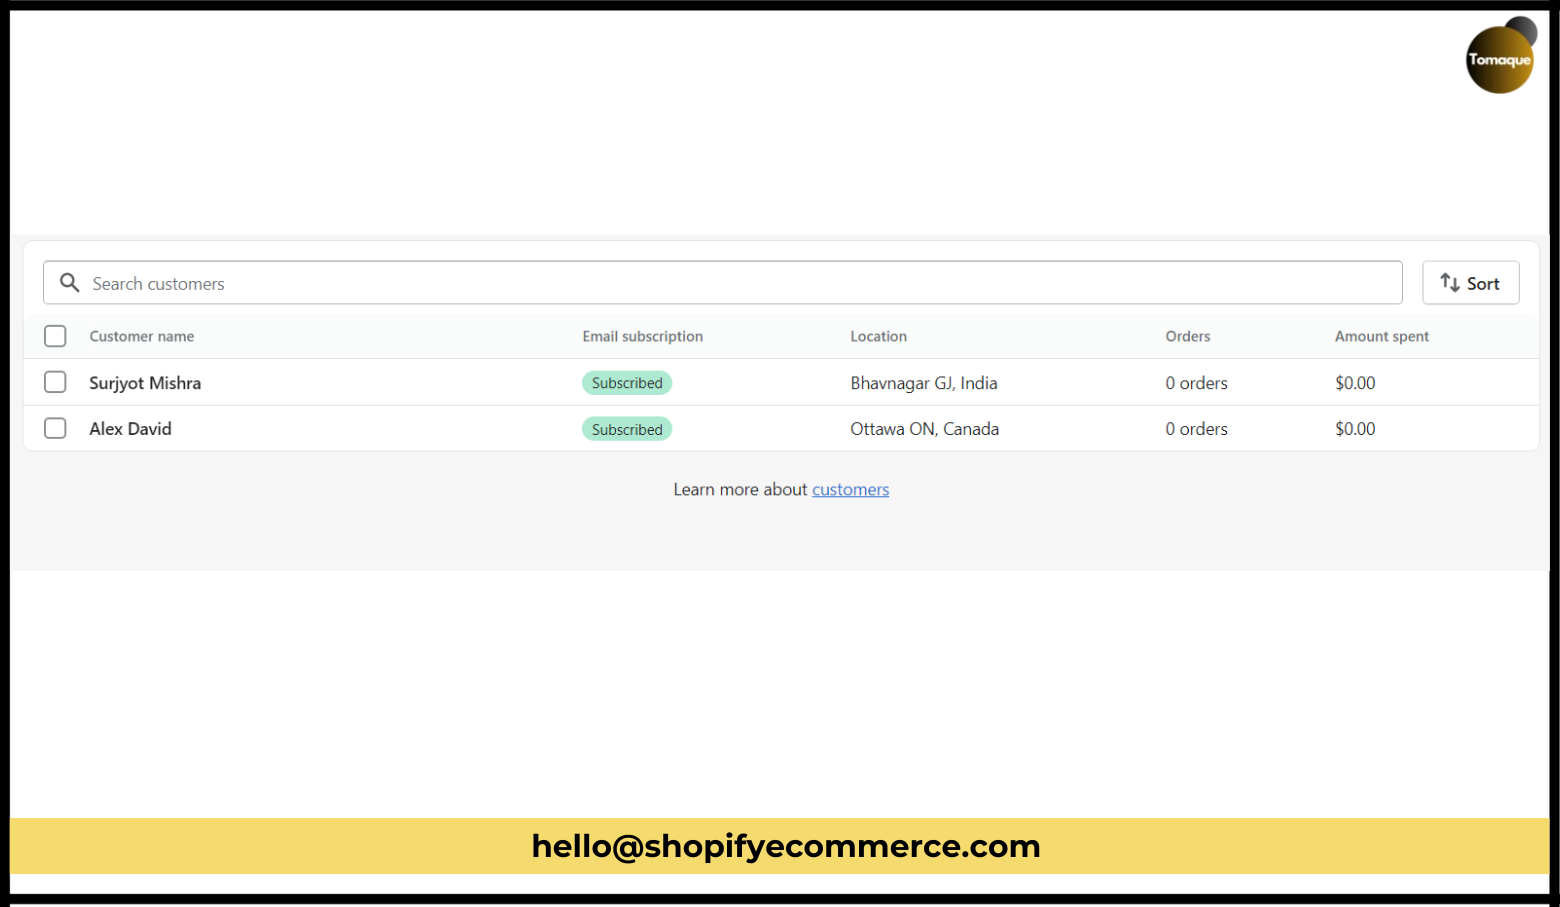
Now, wait for a little while as the computer works on importing all your customers! Depending on how many customers you have, it might take a few minutes.
Once everything is done, you will see a message telling you that the import was successful! 🎉
Best Practices for Importing Customers
While importing customers is easy, there are some important things to remember:
- Follow the Template: Make sure your CSV file looks just like the template.
- Watch Out for Capitalization: The headers in Shopify need to be written exactly as they are in the template (like using capital letters where needed).
- Save as CSV: Make sure to save your file as a .csv file and not any other type like .xls.
- Use Google Sheets: You can use Google Sheets instead of Excel if that’s easier for you!
- Test with a Few Customers First: If you have many customers, try importing just a few first to make sure everything works well.
What Happens After Importing Customers?
After importing customers, they won’t have their passwords saved in the new store. You will need to send them emails so they can set up their passwords again and access their accounts.
You can easily send these invitation emails from your admin panel or use an app that helps send many emails at once.
Conclusion
Moving your customers to your new online store is very important! By following these steps, you can easily import all their information using a CSV file. This way, they will feel welcomed and recognized when they come back!
If you have any questions or need help with anything else about moving your store or managing it, just ask! We are here to help! 😊 Happy selling!