Are you looking to add a canonical tag in Shopify? This guide will walk you through the step-by-step process to implement canonical tags effectively, helping you manage duplicate content issues that can negatively impact your SEO.
What is a Canonical Tag?
A canonical tag is an HTML element that helps search engines understand which version of a webpage should be considered the original when multiple pages contain similar content. By using a canonical tag, you tell search engines which URL to prioritize for indexing, thus preventing duplicate content issues.
The canonical tag is formatted like this:
xml
<link rel=”canonical” href=”https://example.com/original-url/” />
In simple terms, it communicates to search engines: “This page is a duplicate; here’s the URL of the original page.”
Understanding Canonical URLs in Shopify
One common issue for online stores is that a single product page can be accessed through multiple URLs. For example:
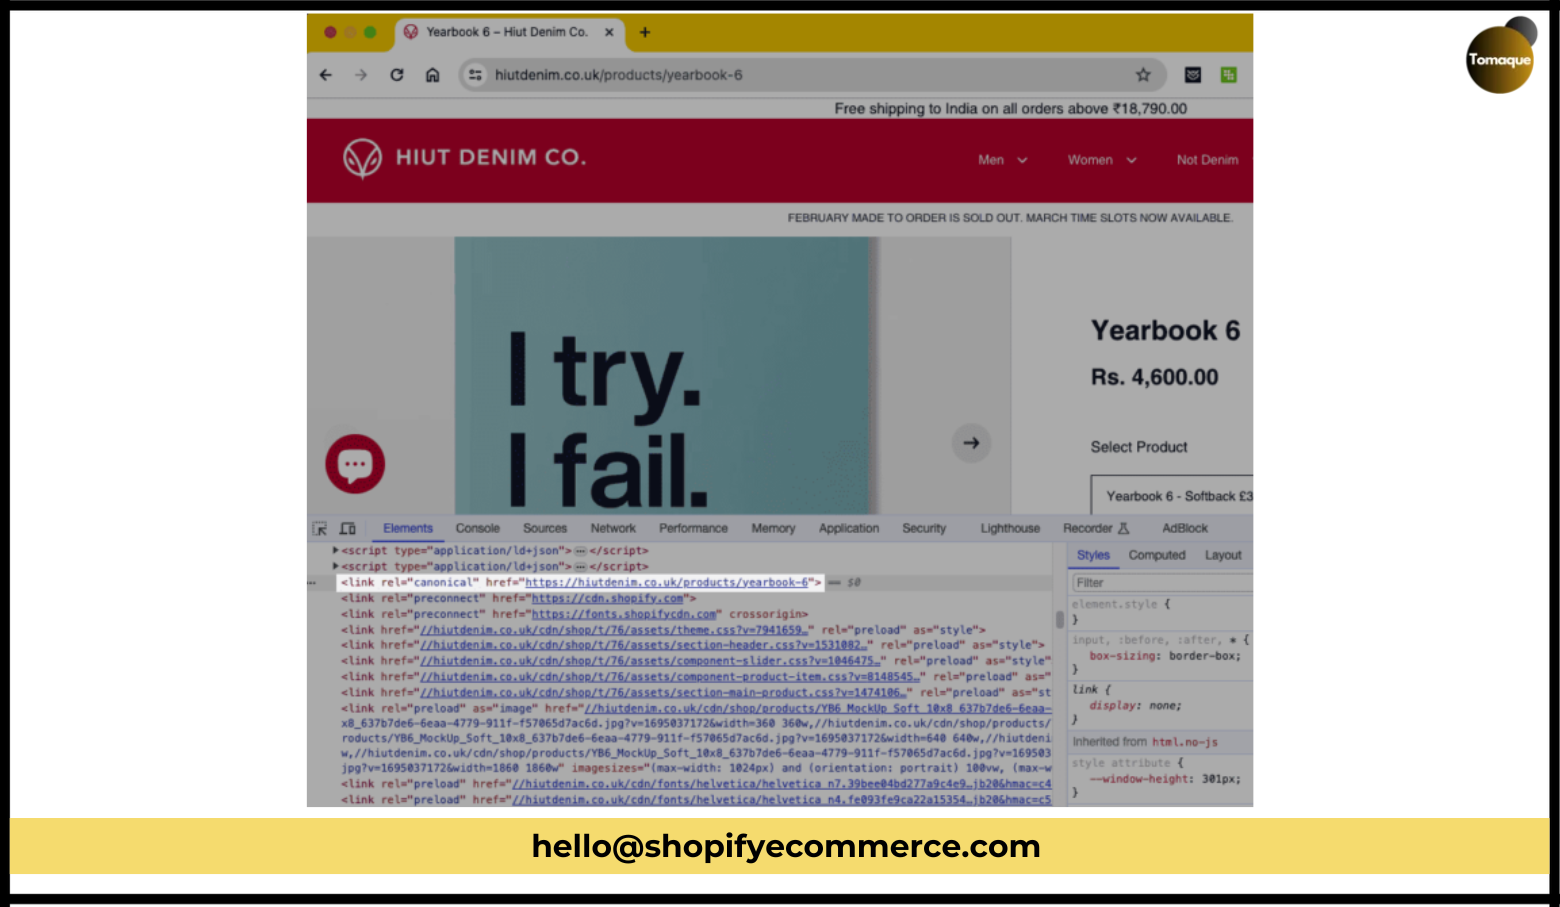
- https://hiutdenim.co.uk/products/yearbook-6
- https://hiutdenim.co.uk/collections/do-one-thing-well/products/yearbook-6
This can lead to search engines crawling and indexing multiple URLs for the same content, which is problematic. Fortunately, Shopify automatically adds self-referential canonical tags to its pages, meaning each page points to itself as the original URL.
How to Add Custom Canonical URLs in Shopify
While Shopify’s automatic self-canonical tags help with many issues, you might still need to assign custom canonical URLs for different pages with similar content. Here are two methods to do this:
- Change Shopify Canonical URL via Coding
- Use an App to Add Canonical Tags
You can choose whichever method suits your expertise level.
Method 1: Change Shopify Canonical URL via Coding
Step 1: Create Metafields for Canonical URLs
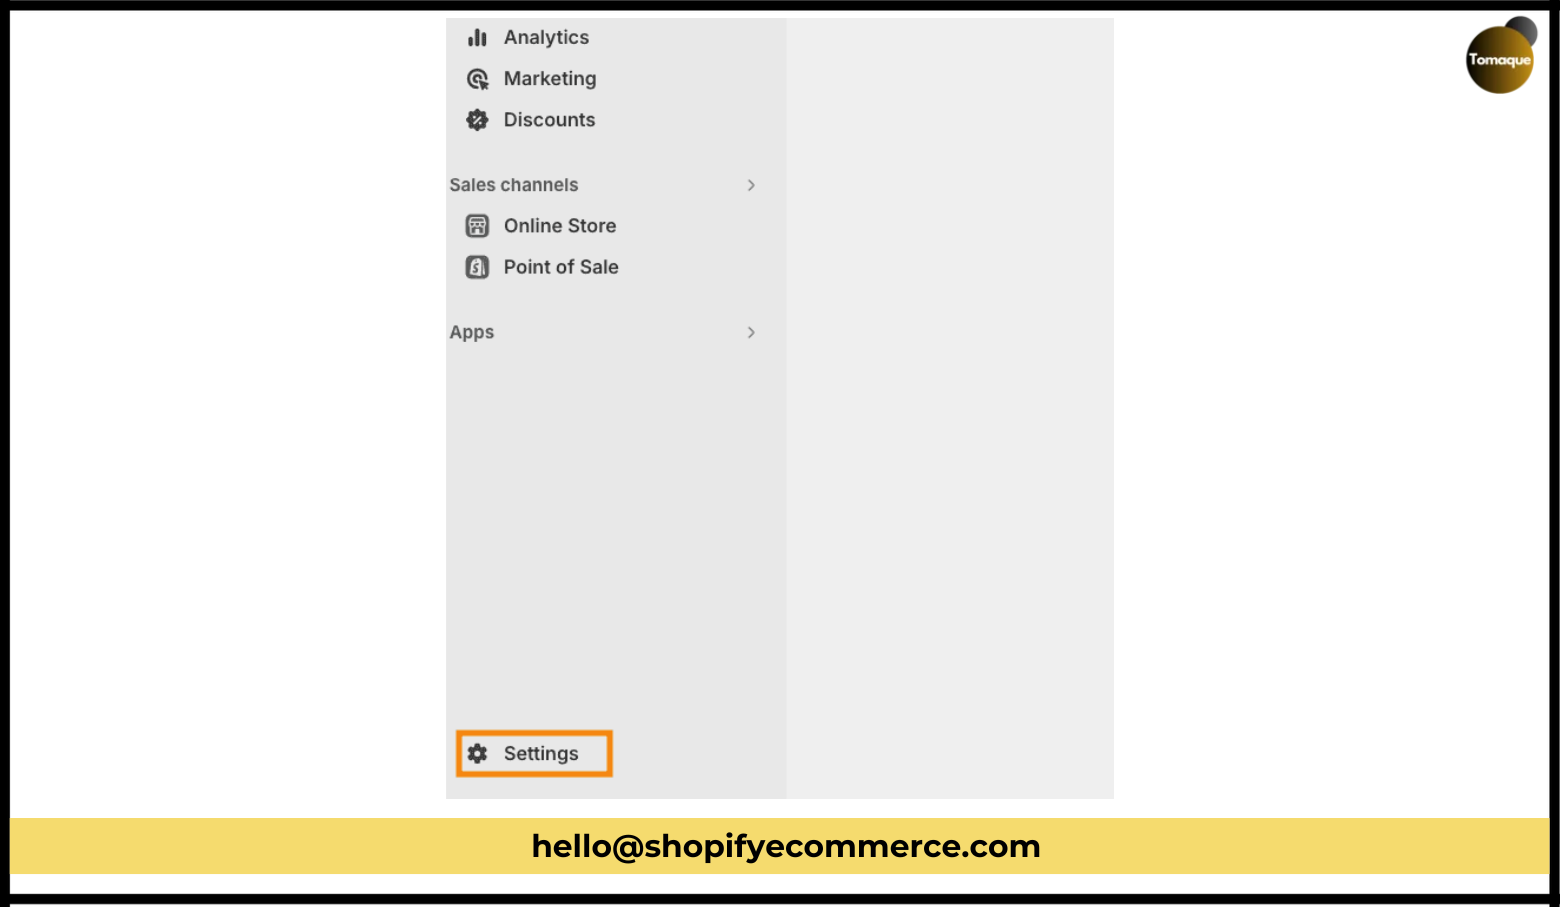
- Log into Your Shopify Admin: Go to your Shopify account.
- Access Settings: Click on “Settings” at the bottom left.
- Go to Custom Data: In the left menu, select “Custom data.”
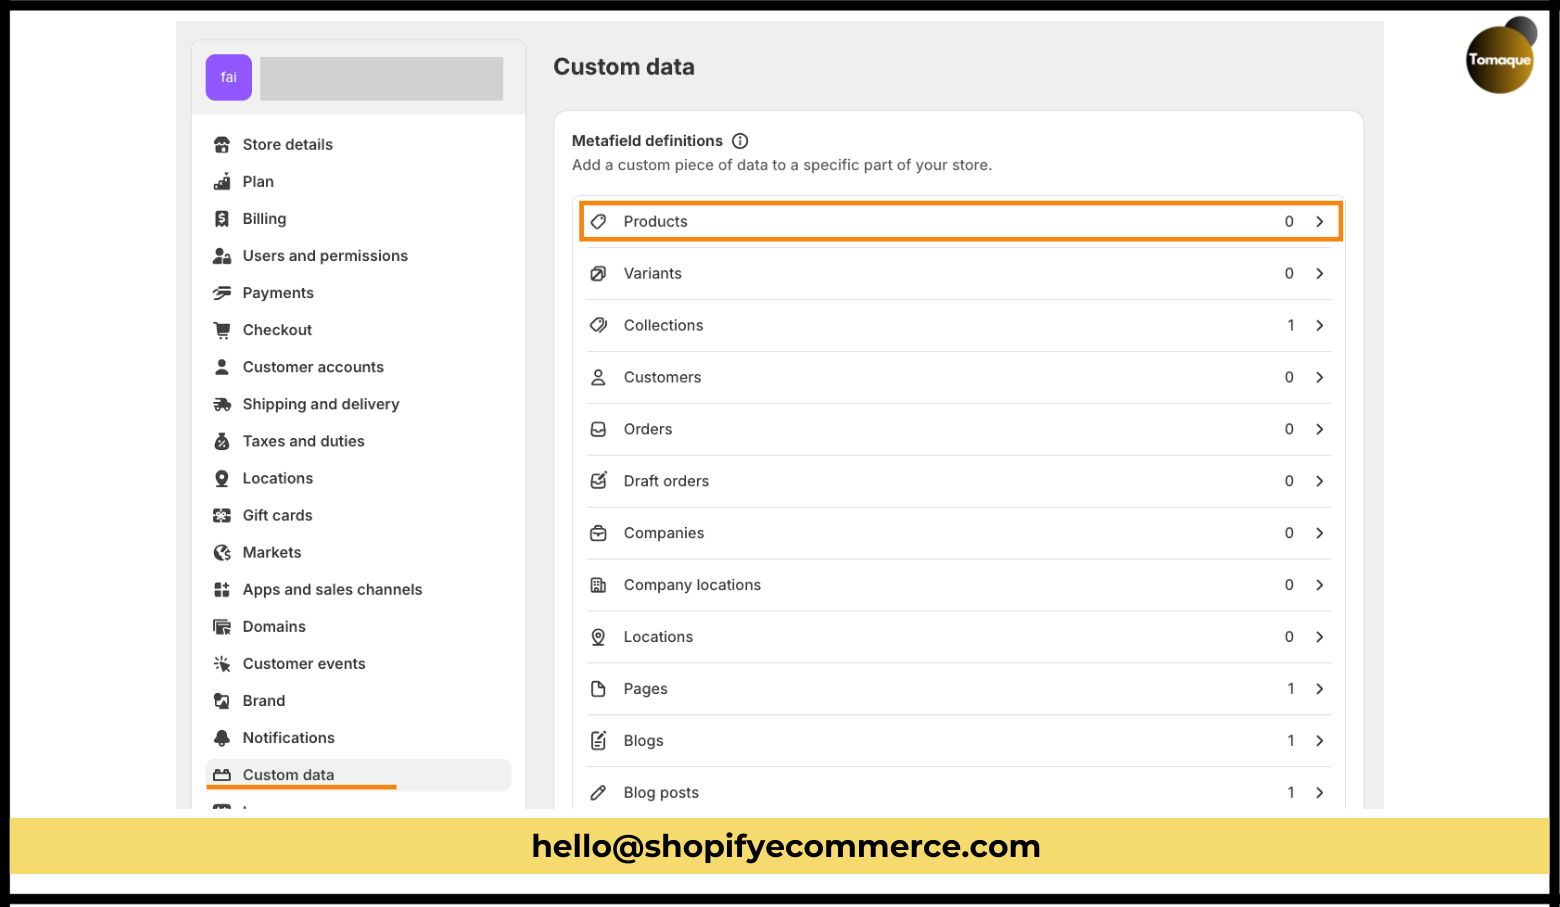
- Select Products: Click on “Products” to create a custom metafield for products.
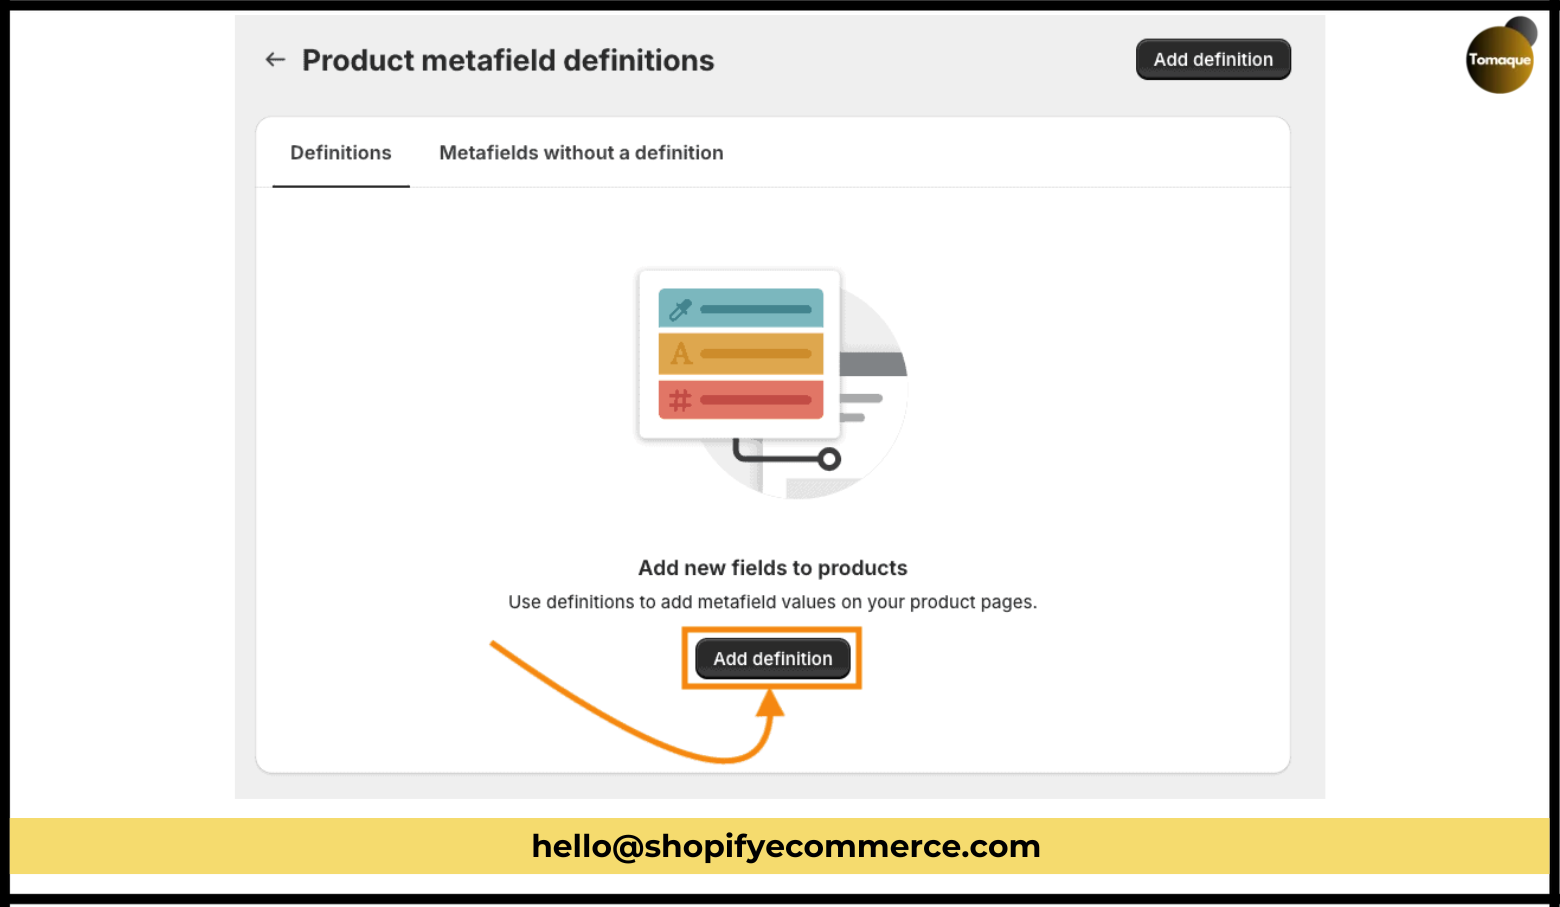
- Add Definition: Click “Add definition” and name it “Custom Canonical.” This creates a key named custom.custom_canonical.
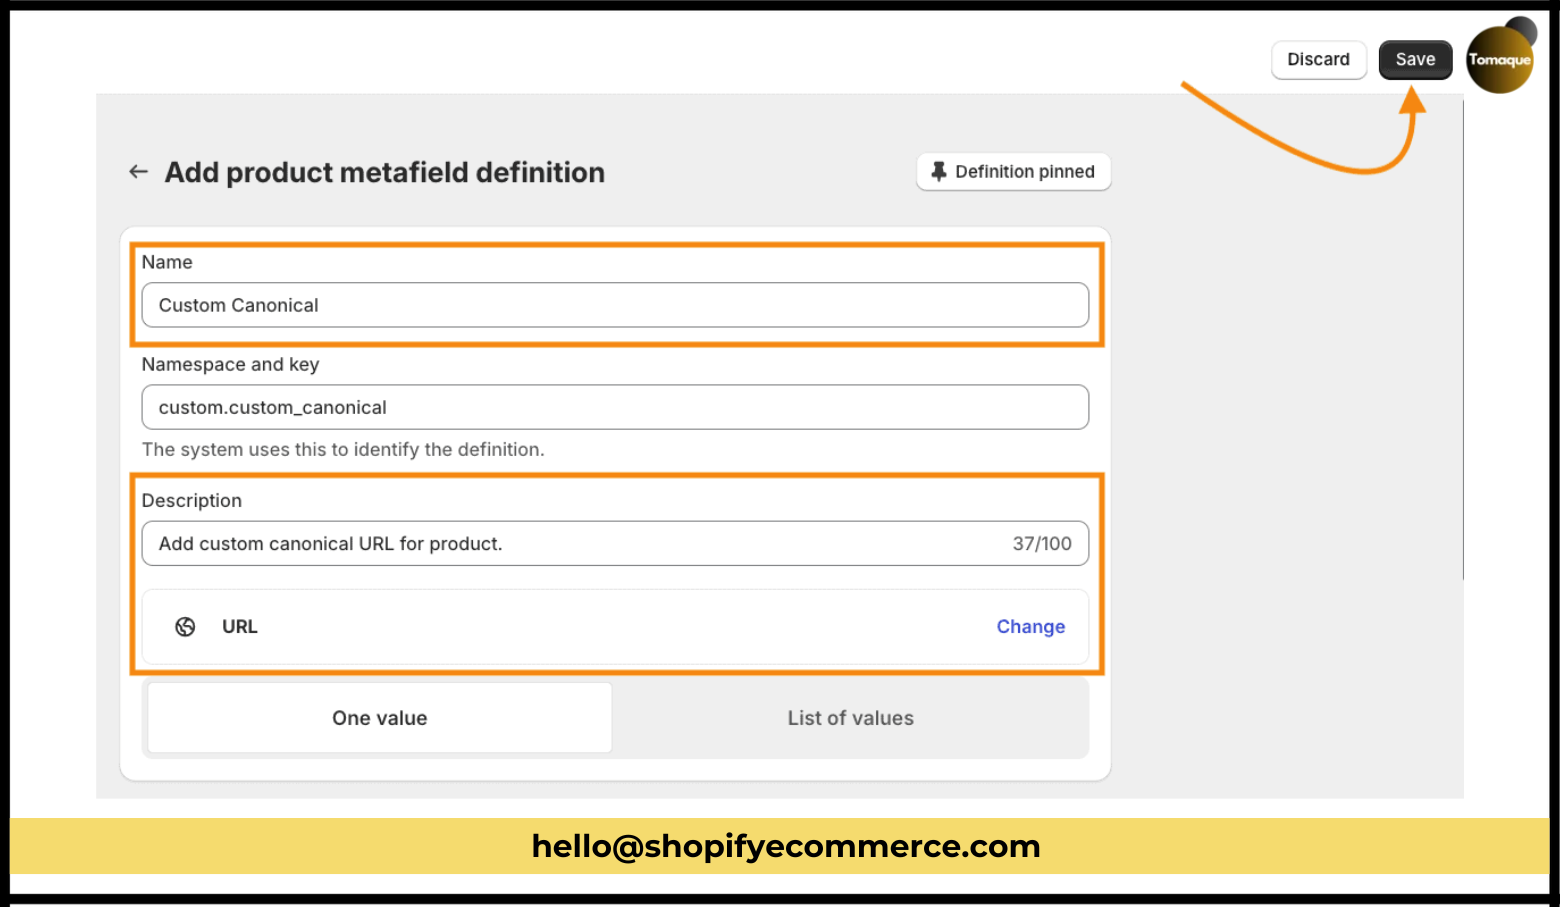
- Set Type: Choose “URL” as the type and click “Save.”
Step 2: Modify theme.liquid Code
- Navigate to Themes: Go to “Online Store” > “Themes.”
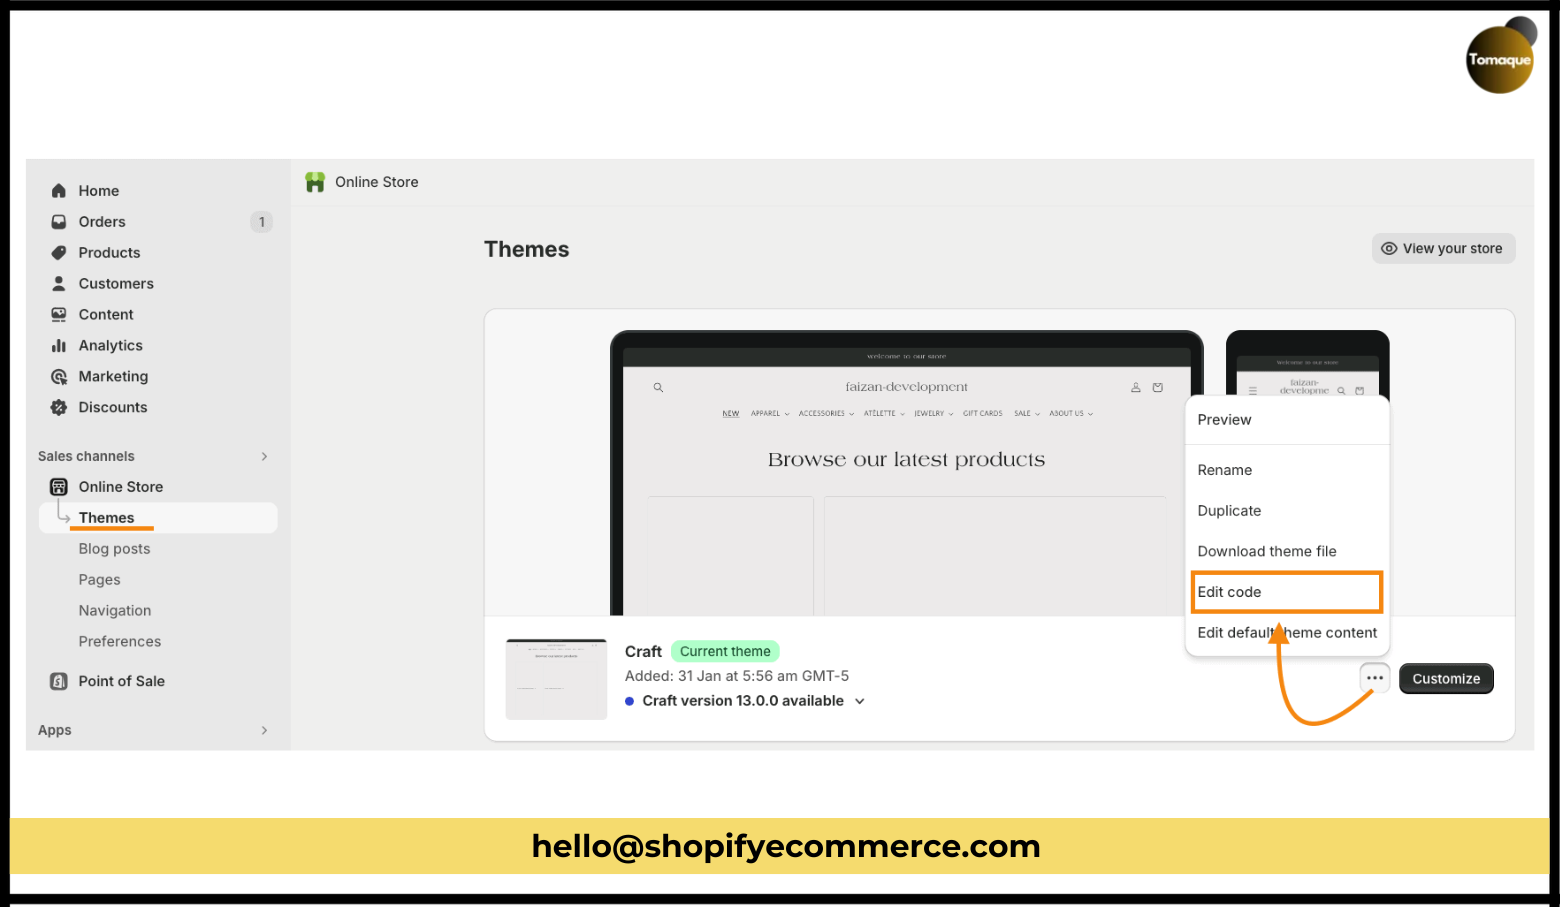
- Edit Code: Click the three dots next to the “Customize” button and select “Edit code.”
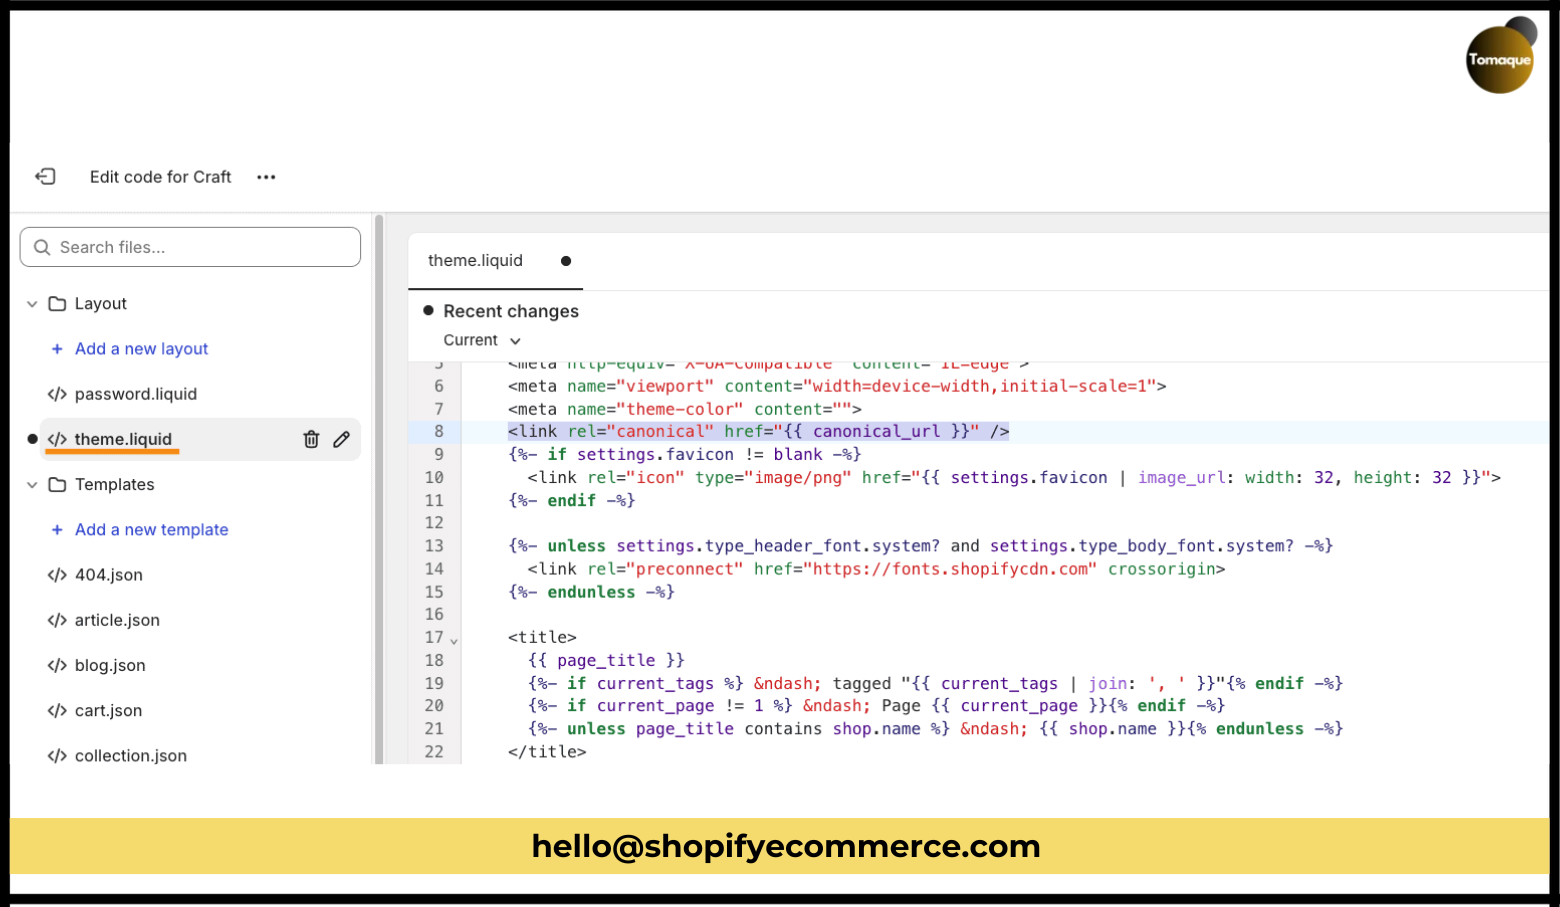
- Open theme.liquid: Find and open the theme.liquid file.
- Replace Canonical Tag Code: Look for the existing canonical tag code:
xml
<link rel=”canonical” href=”{{ canonical_url }}” />
Replace it with:
text
{% if product %}
{% assign custom_canonical_url = product.metafields.custom.custom_canonical %}
{% if custom_canonical_url %}
<link rel=”canonical” href=”{{ custom_canonical_url | escape }}” />
{% else %}
<link rel=”canonical” href=”{{ canonical_url }}” />
{% endif %}
{% else %}
<link rel=”canonical” href=”{{ canonical_url }}” />
{% endif %}
- Save Changes: Click “Save” after making these modifications.
Step 3: Assign Canonical URLs
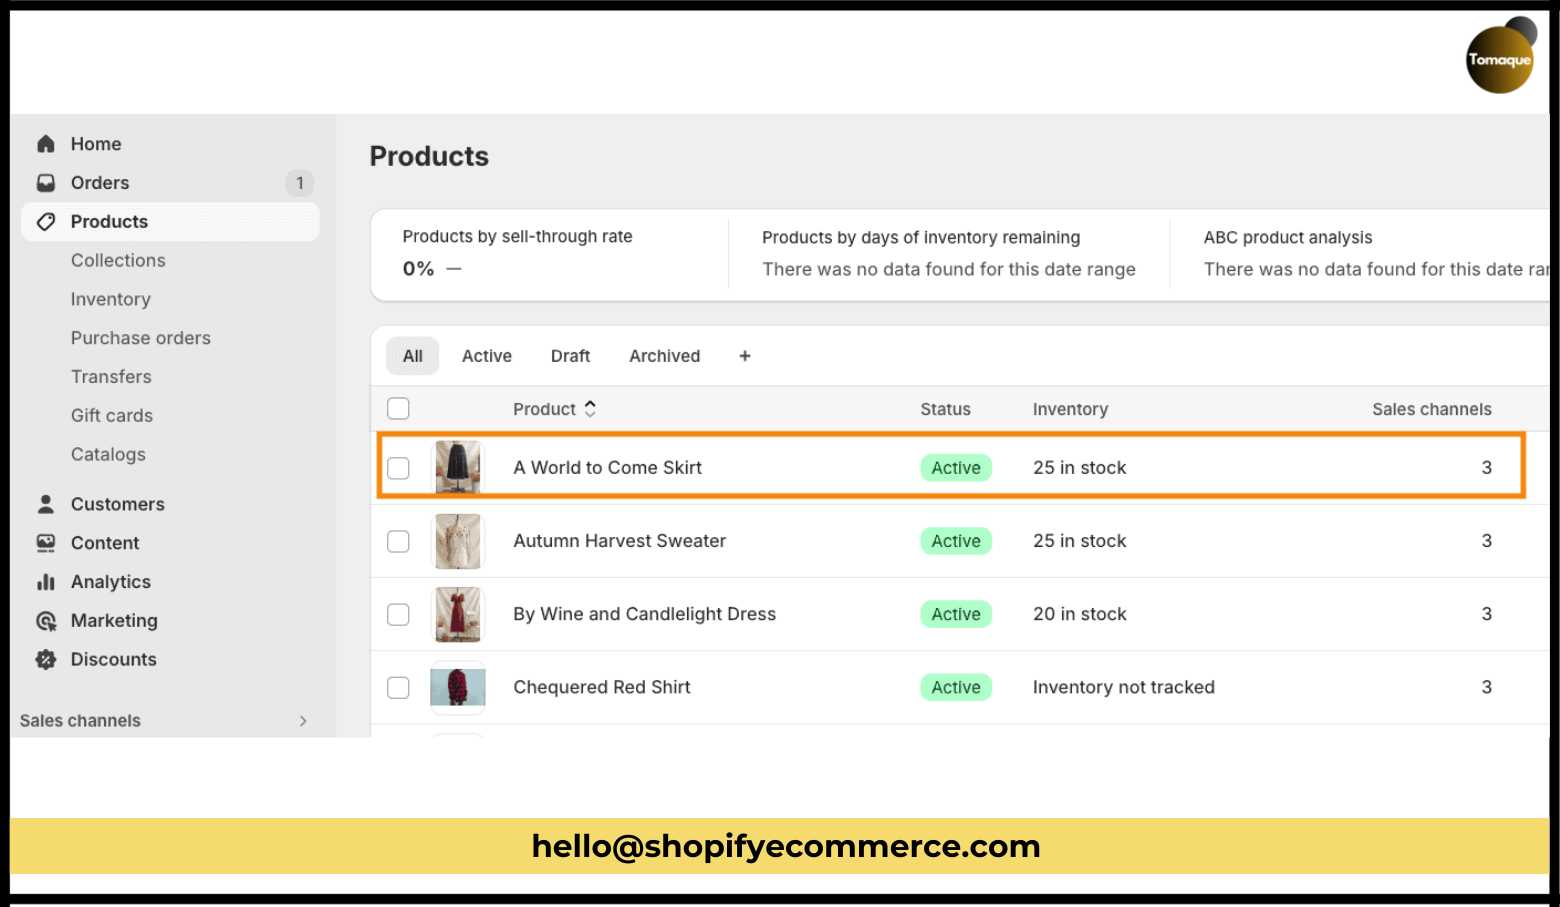
- Edit Product Page: Go to “Products” in your Shopify admin and select the product you want to edit.
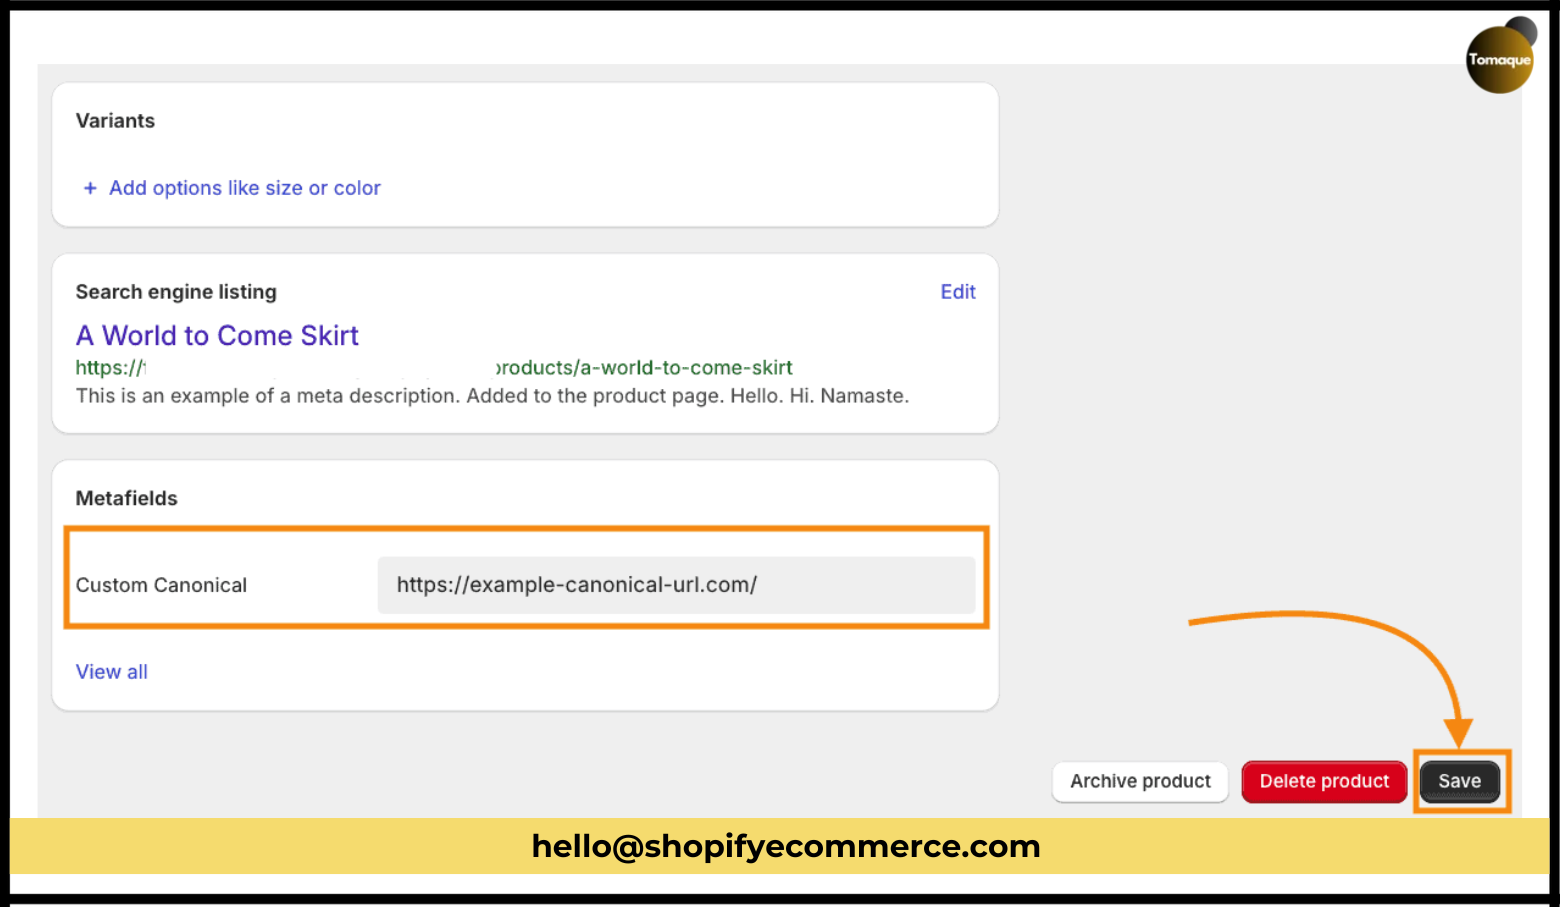
- Scroll to Metafields: Find the Metafields section.
- Enter Custom URL: Input your desired custom canonical URL (e.g., https://example-canonical-url.com/).
- Save Changes: Click “Save.”
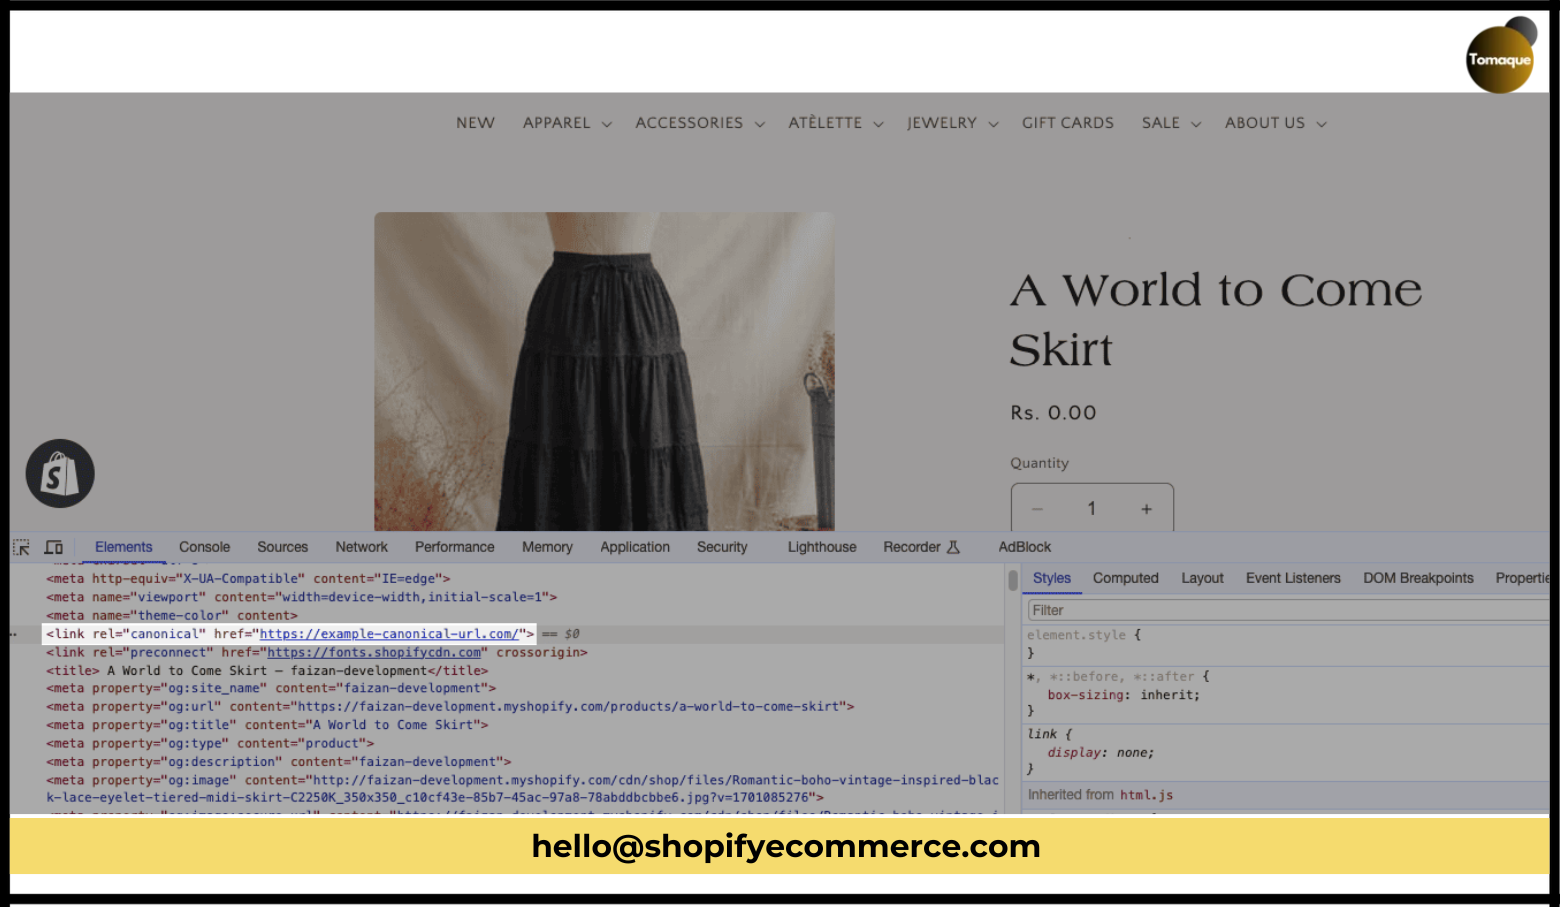
You can now verify that your assigned canonical URL appears in the product page’s HTML.
Method 2: Use an App to Add Canonical Tags
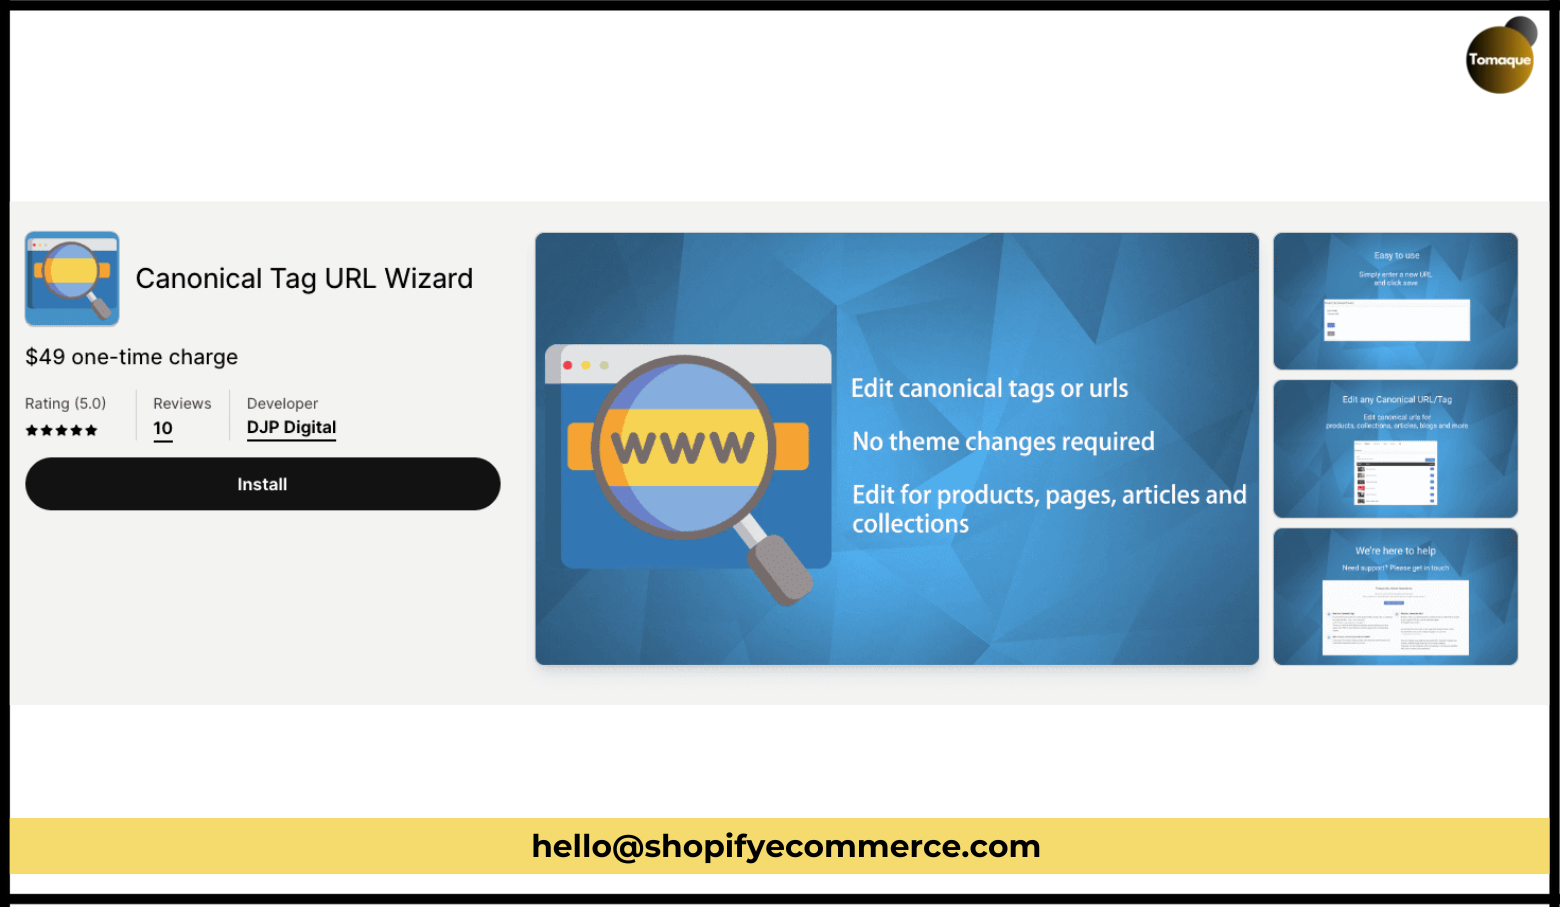
If you prefer a simpler method without coding, consider using an app like Canonical Tag URL Wizard. This app allows you to modify canonical URLs for products, pages, collections, and articles without needing any theme modifications.
- Pricing: The app typically charges a one-time fee of $49.
Expert Tips on Using Canonical Tags in Shopify
- Ensure all original pages have self-referencing canonical tags.
- For duplicate pages, always point the canonical tag to the original URL.
- Each webpage should have only one canonical tag.
- Regularly test and validate your added canonical tags using Google Search Console.
Conclusion
Canonical tags are essential for managing duplicate content issues in your Shopify store. Whether you choose to implement them through coding or by using an app, ensuring proper use of canonical tags will enhance your SEO efforts and improve your store’s visibility.
If you need assistance or have questions about implementing canonical tags on your site, feel free to reach out!