Blog Template on Shopify: The Step-by-Step Process
Now, let’s dive into the process! Follow these simple steps, and you’ll have your Shopify blog template ready in no time.
Step 1: Log Into Your Shopify Account
- First, open your web browser and go to the Shopify website.
- Enter your login details to access your Shopify admin account.
Step 2: Go to the “Themes” Section
- Once you’re logged in, look for the Online Store section in the left-hand menu.
- Under Online Store, click on Themes. This will show you the theme you’re currently using for your Shopify store.
Step 3: Edit the Code
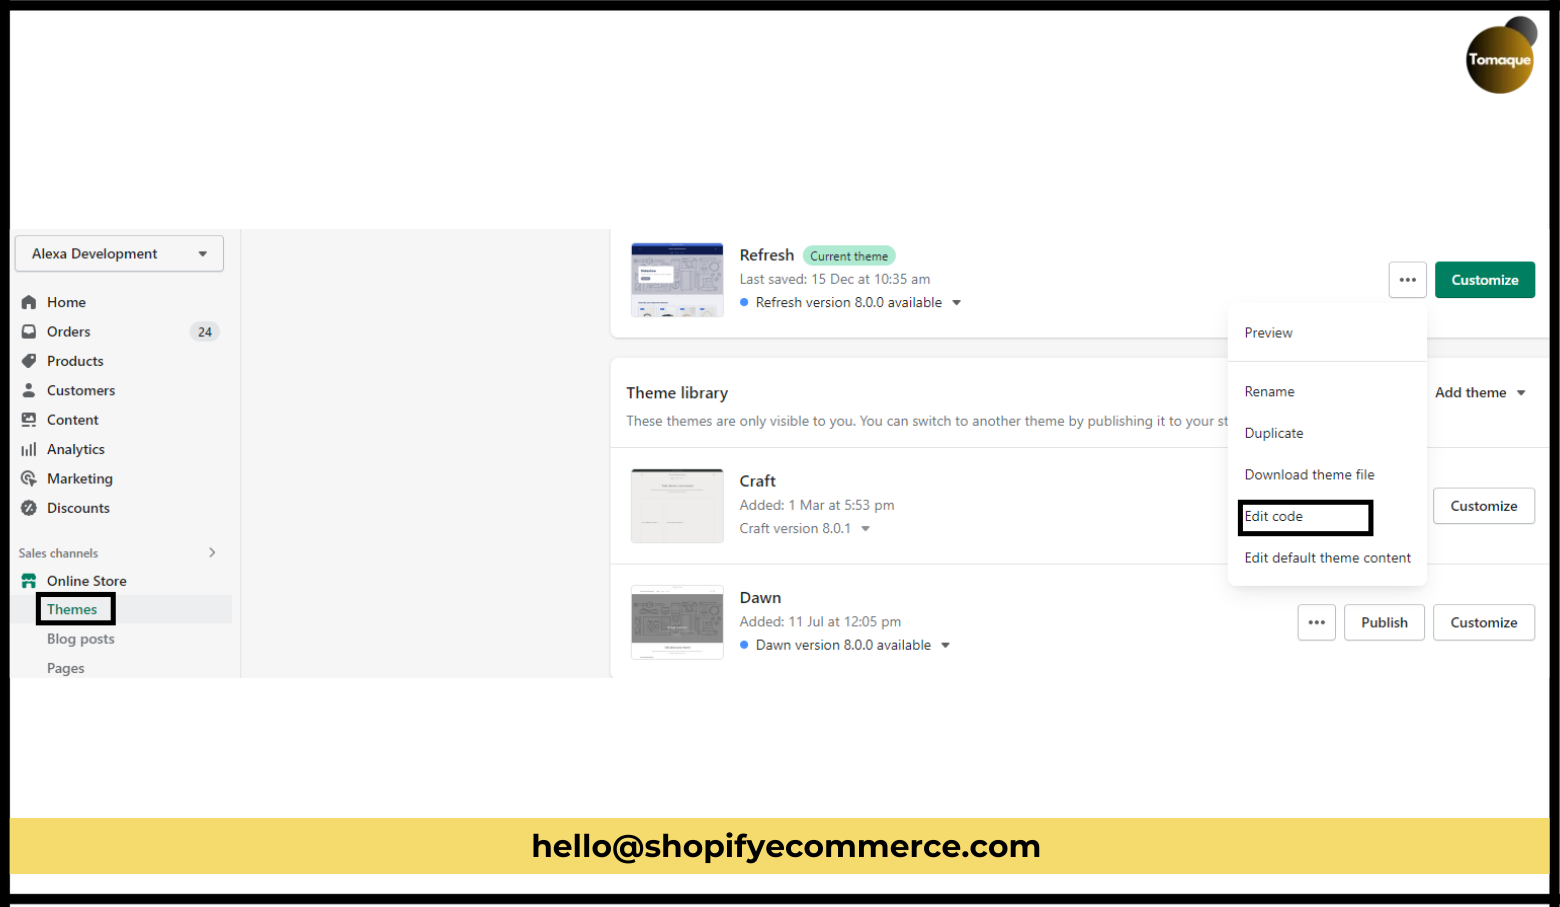
- Find your current theme on the Themes page.
- Click on the Actions button next to your theme. It looks like three dots stacked together.
- From the drop-down menu, select Edit Code. This will open the code editor where you can make changes to your theme.
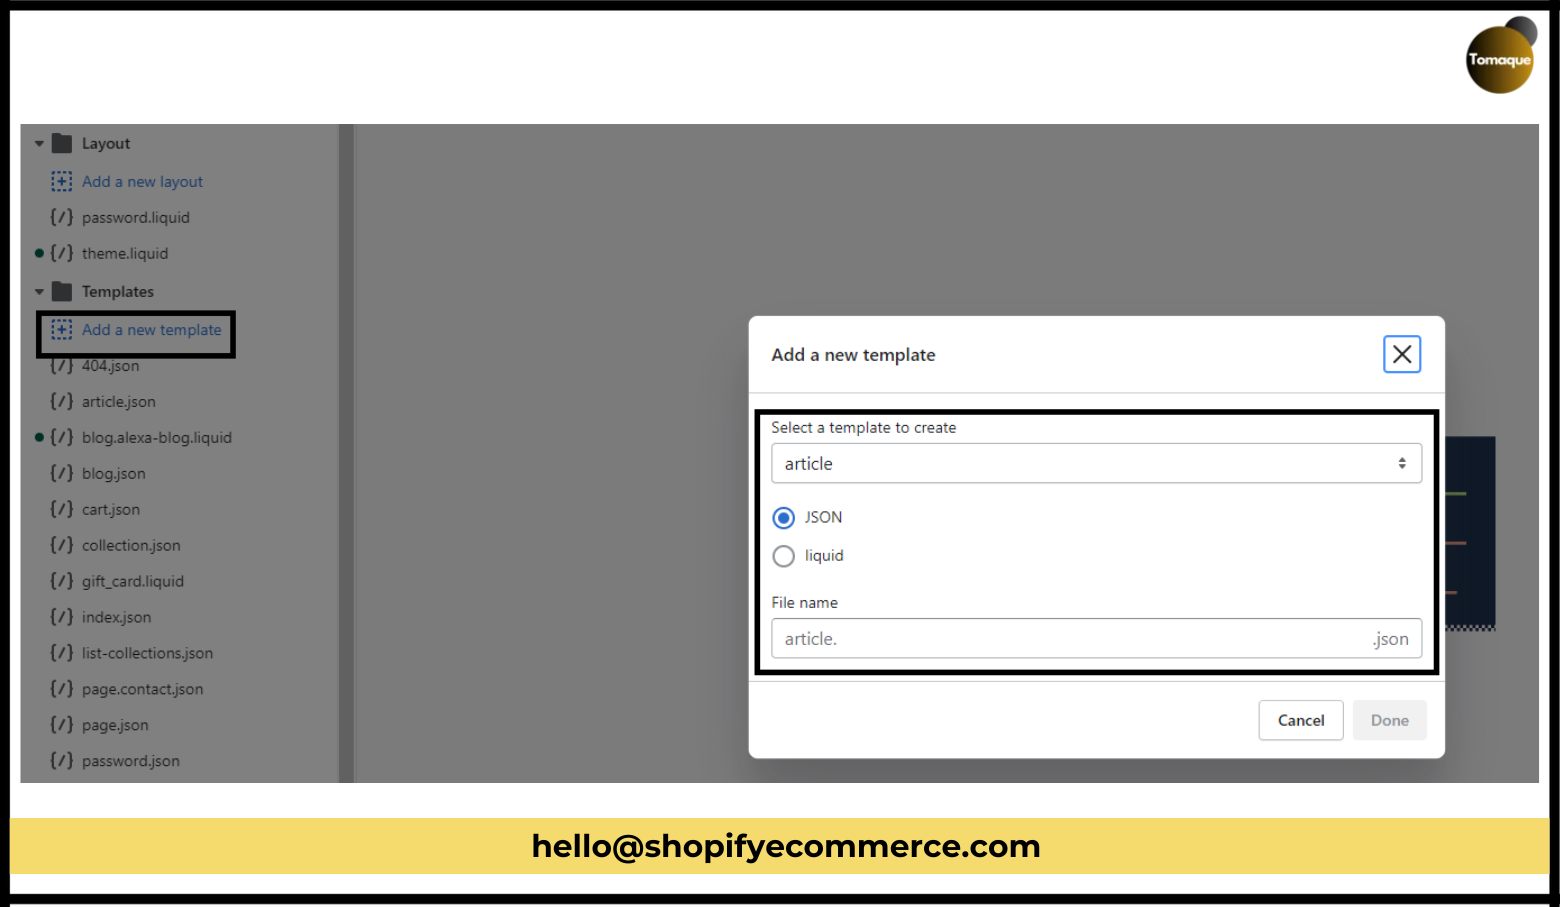
Step 4: Add a New Template
- In the code editor, you’ll see a menu on the left side with different folders and files. Look for the folder called Templates.
- Click on Templates, and you’ll see an option to Add a new template.
- Click on Add a new template, and a dialog box will pop up.
Step 5: Choose the Article Option and Name Your Template
- In the pop-up box, you’ll need to select the Article option from the dropdown menu. This tells Shopify that you’re creating a template for blog articles.
- Next, you’ll need to give your template a name. You can choose a simple name like “My Blog Template” or something more specific to your style.
Step 6: Create Your Template
- After you’ve named your template, click Create Template. This will create a new template file for your blog.
- Now you can start customizing the template with your own code! You can change things like the layout, colors, fonts, and add special features like a sidebar or image gallery.
- If you don’t know how to code, don’t worry! There are many tutorials available online, or you can hire a professional if you want a more customized design.
Step 7: Save Your Template
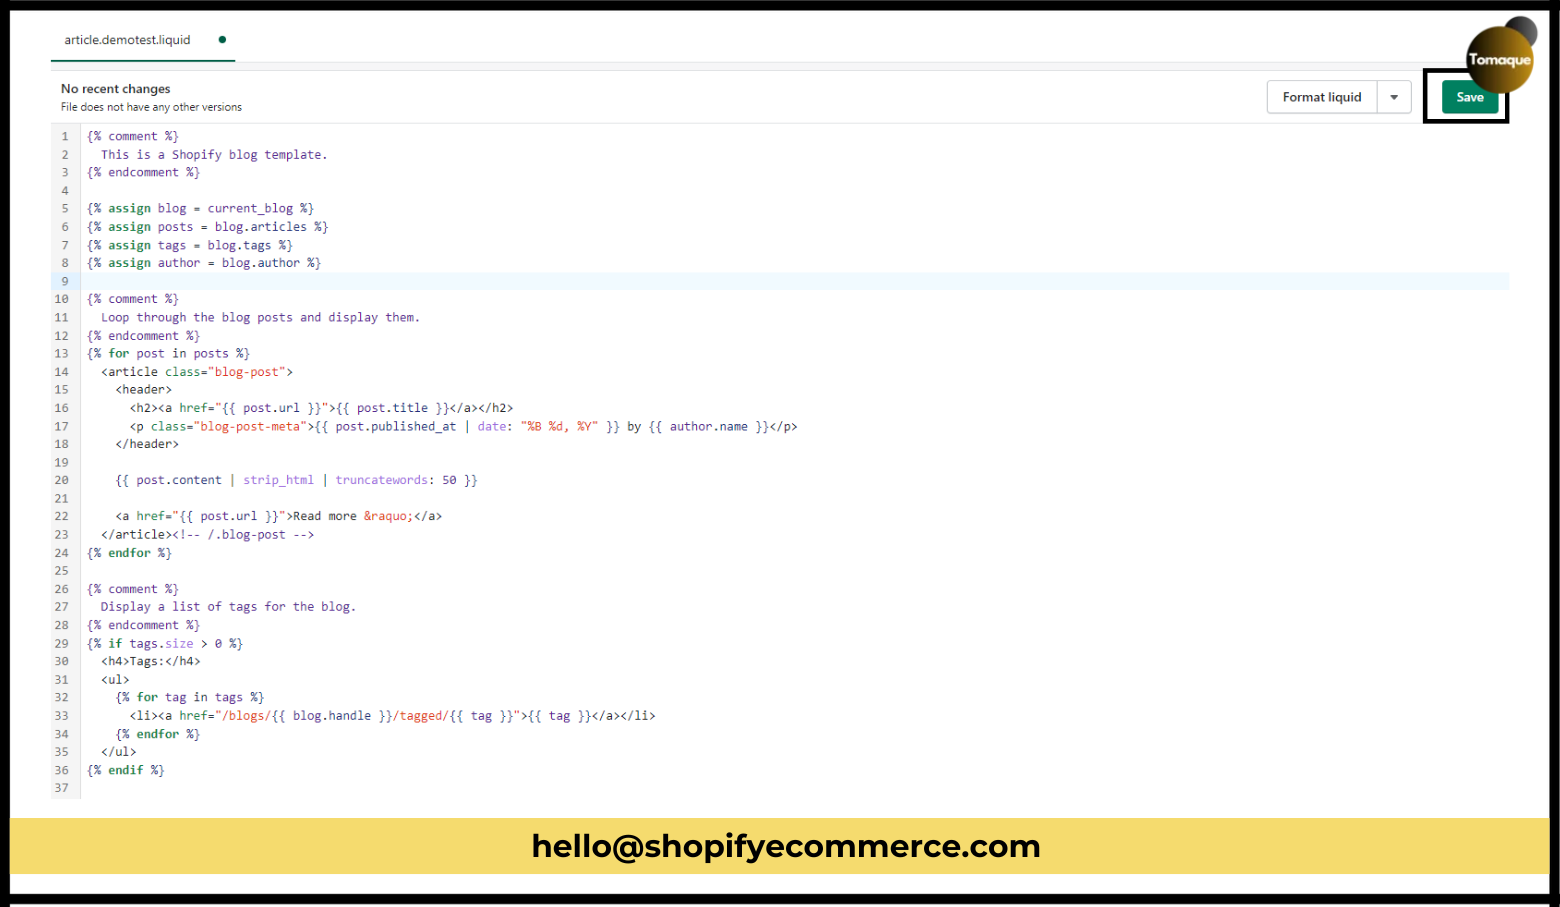
- Once you’ve made all the changes you want to your template, make sure to click Save in the top-right corner of the code editor. This will save your work and apply the new blog template to your store.
- You can always go back and edit the template later if you want to make any changes or improvements.
Step 8: Assign Your Template to a Blog Post
- After saving your new blog template, it’s time to use it! To apply your new template to a blog post, go to your Shopify admin page and navigate to Online Store > Blog Posts.
- Create a new blog post or edit an existing one.
- In the blog post editor, you’ll see an option to Choose a Template. From the dropdown menu, select the template you just created.
- Once you’ve applied the template, your blog post will automatically display using the new layout and design.
Step 9: Preview and Test Your Blog Template
- Before you make your blog live, it’s always a good idea to preview how it looks. Click on Preview to see how your blog post will appear to visitors.
- Check for things like readability, how the images look, and whether the layout is responsive (meaning it adjusts to different screen sizes like phones and tablets).
- If everything looks good, you’re ready to go!
Now you’ve successfully created your own custom blog template on Shopify! By following these steps, you can design a blog that perfectly suits your store’s style and helps engage your visitors.
Why Is a Blog Template Important for Your Shopify Store?
Creating a custom blog template is important because it lets you control the way your content looks. A good-looking, easy-to-read blog will help keep visitors on your site longer, which can lead to more sales and a loyal customer base.
You can use your blog to share helpful tips, product updates, and stories that will make your customers feel more connected to your brand. Regularly posting blogs that align with your business goals will help you build trust with your audience and turn casual visitors into loyal customers.
Final Thoughts: You’ve Got This!
We hope this guide has made creating a blog template on Shopify feel simple and doable. Even though it might seem technical at first, taking it step-by-step makes it easier to manage. Remember, the key to creating a successful blog is to make it engaging, fun, and easy for your visitors to read.
If you ever get stuck or need help with editing the code, don’t hesitate to reach out to Shopify support or hire a professional. And don’t forget to share your new blog design with your friends, fellow Shopify store owners, or any online communities you’re part of. Sharing tips and helping others is a great way to learn and grow your business!
Good luck with your blog creation, and happy designing!