Shopify Login for Store Admin
If you’re an online store owner, you need to log into Shopify to manage your store. This is how you do it!
How to Log in to Shopify Admin (Store Owner):
On a Desktop Computer:
- Open a web browser (like Google Chrome, Safari, or Firefox).
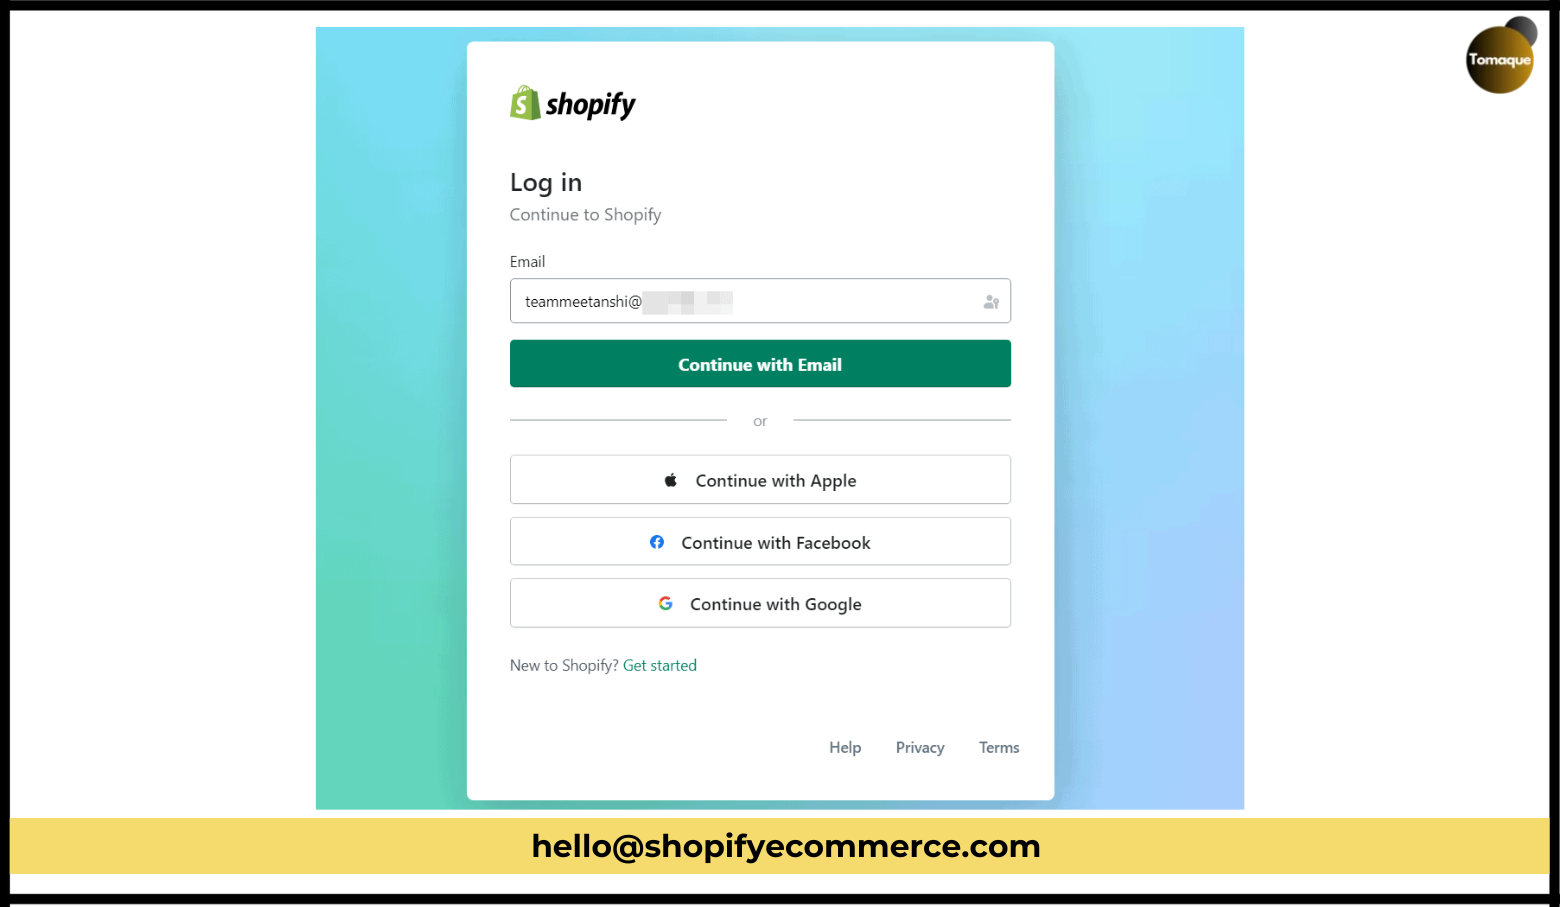
- Type in this URL: accounts.shopify.com.
- You’ll see a page that asks for your email address. Enter the email address you used when you signed up for Shopify.
- You can also choose to log in using Apple, Google, or Facebook if you linked those accounts.
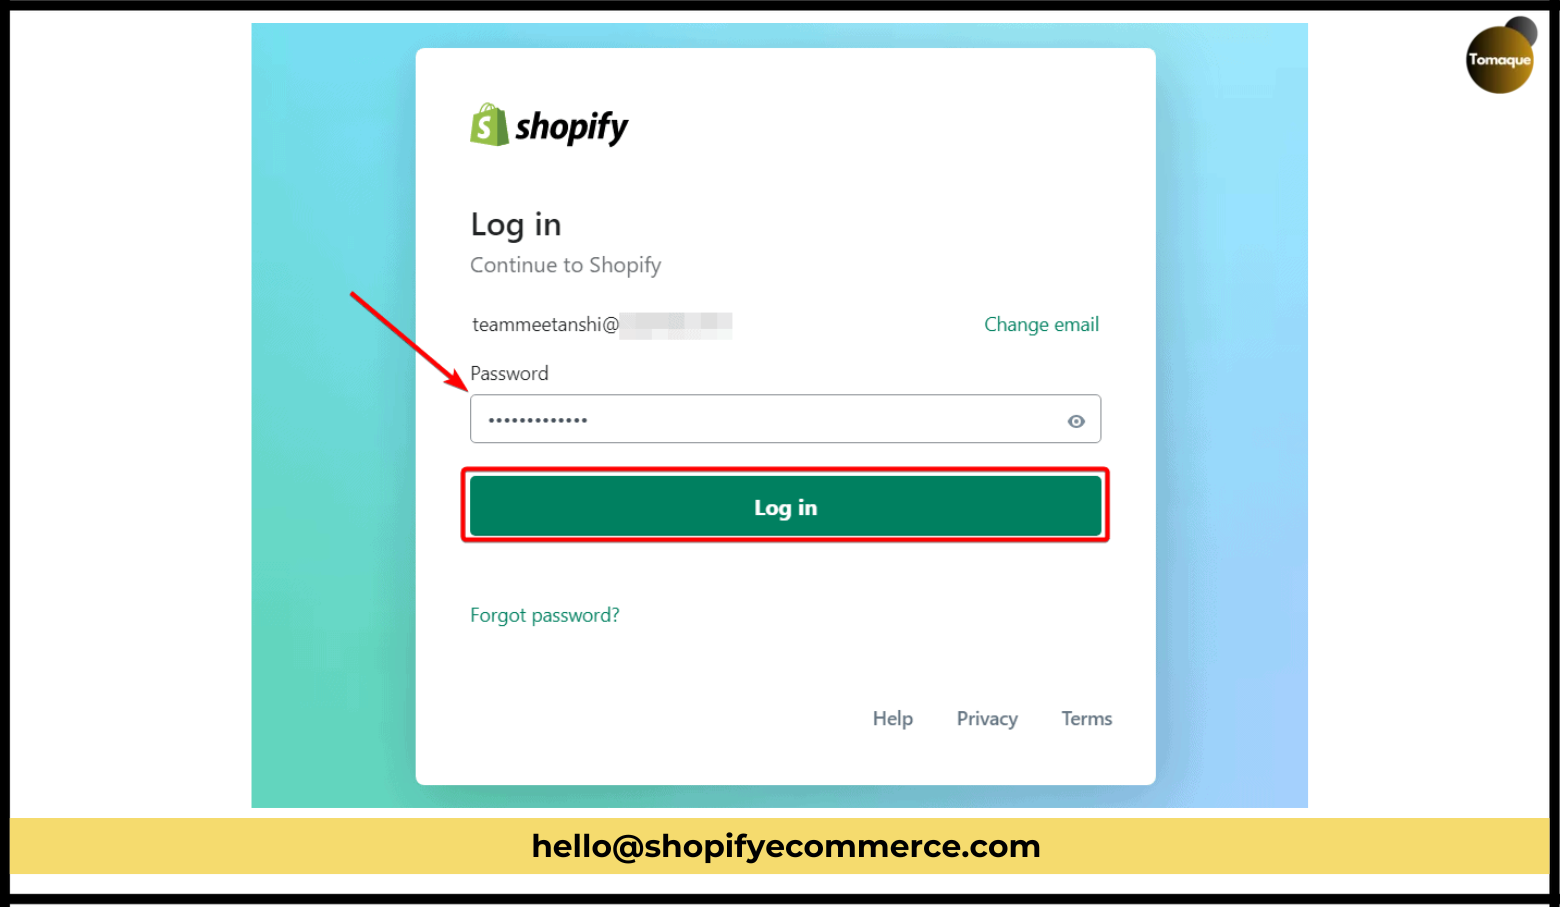
- After entering your email, type in your password.
- If you forgot your password, just click the “Forgot Password” button to reset it.
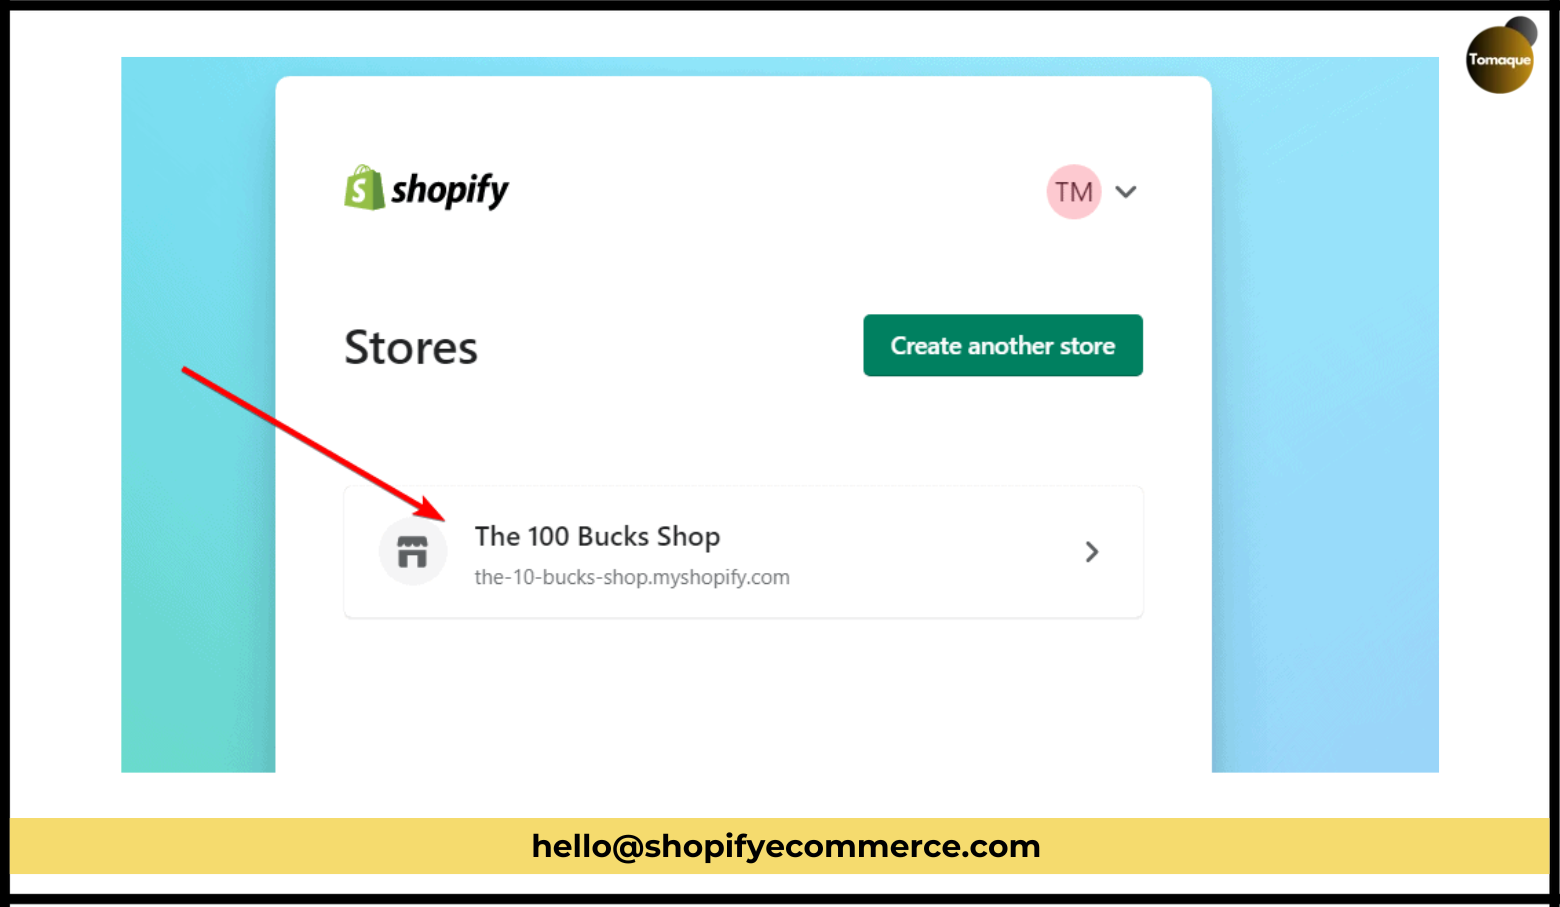
- After logging in, you’ll see a list of your stores. Choose which one you want to manage and click on it.
On a Mobile Phone or Tablet:
- Download the official Shopify app from the App Store (for iPhone) or Google Play Store (for Android).
- Open the app and tap “Log In.”
- Enter your email address and password.
- Once logged in, you’ll be able to manage your store right from your phone!
Logging into Multiple Shopify Stores:
If you have more than one Shopify store, you can log into all of them with one account. Here’s how:
- Log into one of your stores.
- Click on your profile at the top-right of the page.
- Select “Stores” from the menu.
- Choose which store you want to manage and click on it. You can easily switch between stores this way!
Shopify Login for Partners
Shopify Partners are people who help store owners. If you’re a Shopify Partner, here’s how you log in:
How to Log into the Shopify Partner Dashboard:
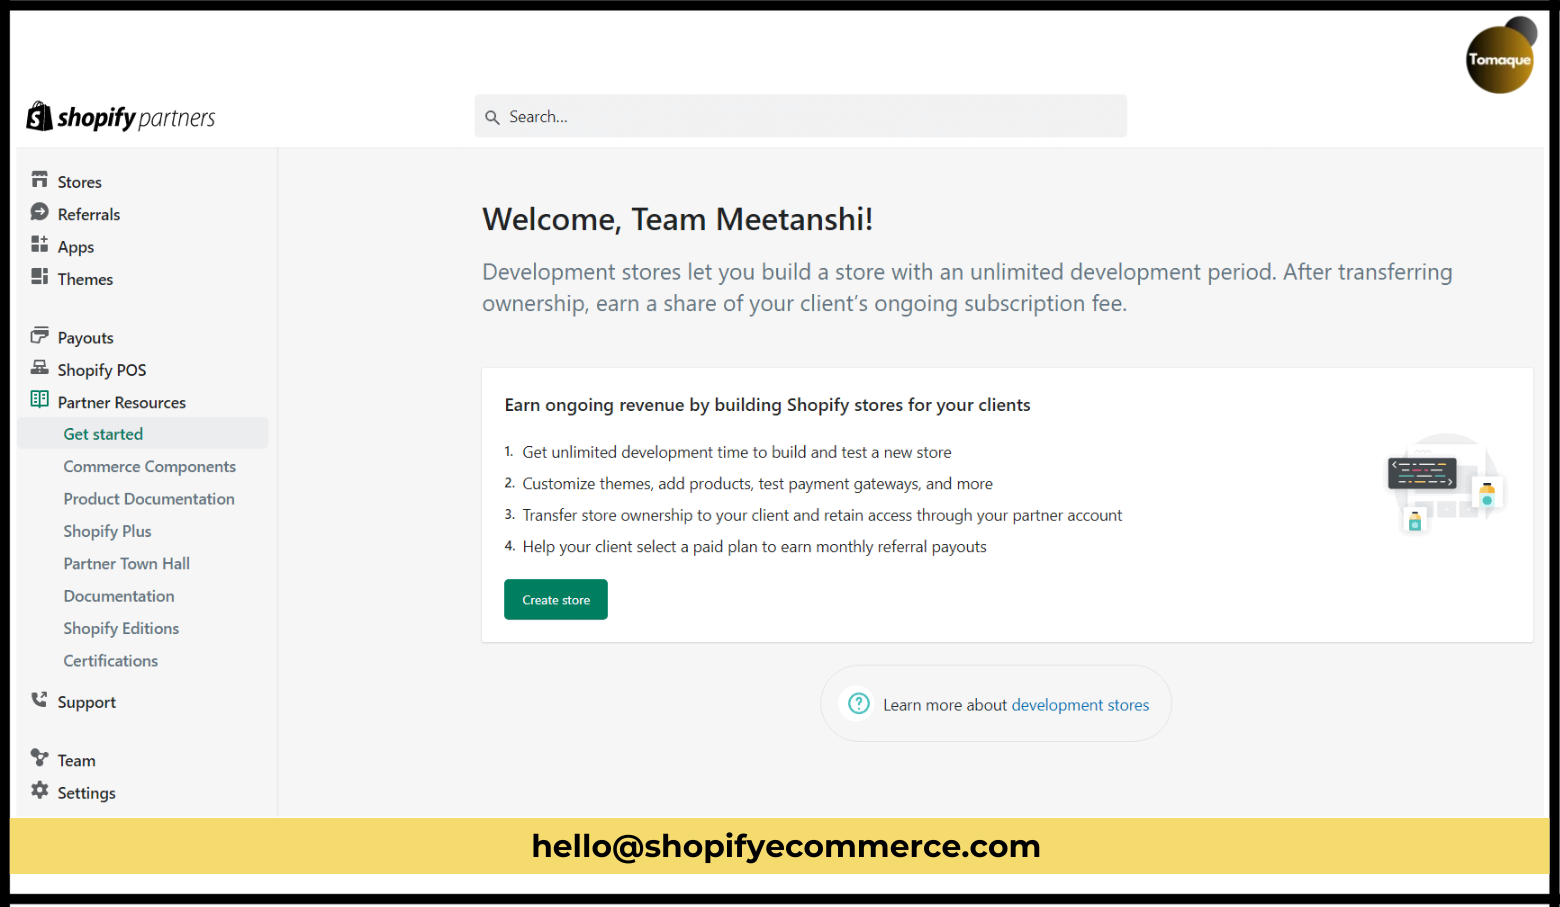
- Go to accounts.shopify.com and select “Shopify Partners.”
- Enter the email address you used for your Partner account.
- Enter your password.
- After logging in, you’ll see the Partner Dashboard, where you can work on your client’s store!
Shopify Login for Customers
Customers are the people who buy things from Shopify stores. If you’re a customer, here’s how to log in:
- Creating an Account:
- When you buy something from a Shopify store, you can create an account to make shopping easier in the future.
- You can see your orders and saved payment information, which speeds up checkout.
- Store owners can also send you an invitation to create an account.
- Logging into Your Account:
- Once you have an account, just visit the store’s website.
- Look for the “Login” option, usually at the top or bottom of the page.
- Enter your email address and password to access your account.
Shopify Login: Common Questions
Sometimes, you might face issues logging in. Here are some answers to help!
- Why Can’t I Log Into My Shopify Account?
- Maybe you entered the wrong email or password. Double-check them and try again. If it’s still not working, you can contact Shopify’s support team for help.
- How to Change My Shopify Login Password?
- Go to your Shopify admin.
- Click on your profile picture in the top-right corner.
- Choose “Manage account” and then go to “Security.”
- Click on “Change your password.”
- Enter your old password, and then choose a new password. Click “Change password.”
- Can I Change My Shopify Login Email?
- Yes! You can change your email address if needed.
- Go to “Settings” in your Shopify admin.
- Select the “Account” tab.
- Under the email section, click “Edit.”
- Enter your new email address and click “Save.”
Extra Tips for Easy Shopify Login
- Make sure your password is strong to keep your account safe.
- Use two-factor authentication (2FA) for added security.
- Enable cookies in your browser to avoid login problems.
Conclusion
Now you know how to log into Shopify as a store admin, partner, or customer. Whether you’re managing your store, offering services, or shopping, the login process is simple and easy to follow. If you have any questions or need help, don’t hesitate to ask!
Hope this guide helps you understand how Shopify login works for everyone. Enjoy your experience with Shopify!